BROCCOLI LEMON DETOX SOUP (vegan, no fat)

This soup is an easy side dish that you can add to any meal to boost your fiber, potassium, and vitamin c intake. It’s super rich in sulfur compounds that stimulate glutathione production in the body, making it a great detox soup for the spring. Broccoli is also a great source of DIM- a compound that clears excess estrogen from the body, in turn balancing the hormones. I love keeping soups like this in the fridge for maintaining my overall health and wellness!
INGREDIENTS:
3 pounds broccoli, rinsed, tough ends trimmed, cut into florets
1 small onion, chopped
1 inch chunk ginger, peeled and sliced
4 cloves garlic, peeled
4 stalks celery, roughly chopped
4 cups filtered water
1-2 teaspoons sea salt (add after cooking)
Juice of one lemon (add after cooking)
DIRECTIONS:
Place all ingredients except lemon juice and salt in a large stockpot with a lid. Bring to a boil then reduce heat, cover, and let simmer for about 15 minutes, or until the broccoli is fork tender and falls apart easily.
Allow to cool for a bit and then transfer to a high speed blender. I use my Vitamix to get a smooth and creamy consistency. I don’t recommend using a hand blender for this
Blend on high until completely smooth. Add one teaspoon of salt and the juice of one lemon and taste. Add more salt if desired, and add more water to reach your preferred consistency.
Allow to cool before storing in the fridge. This makes 2-3 large mason jars of soup, depending on how much water you add.
I made this soup free of added fat and cooking oils to keep it super light and fresh. If you would like a deeper, richer flavor, you could sauté the onion in a tablespoon of olive oil until caramelized, then add the ginger and garlic and sauté for a minute until fragrant. Add the remaining ingredients and follow the recipe as written. For a bisque-like soup, add a cup of full fat coconut milk at the end. However you choose to enjoy it, you’re getting a healthy, delicious soup!

Chickpea & Carrot Curry (gluten free, vegan)

Although I strive to eat a mostly Paleo diet (no grains, legumes, dairy, or refined sugar), I don't always want to eat meat at every meal. In general beans don't completely agree with me digestion-wise (they are legumes), but I still love them, and chickpeas, which are also known as garbanzo beans, are my favorite variety. I grew up eating chickpea curry, and until I discovered how much better I felt eating the Paleo way (almost 3 years ago now), this was in our regular rotation. More commonly known as chana masala on Indian restaurant menus, this is a universally loved dish. I have updated my version of it to be especially kid friendly for my boys by including carrots, because what kid doesn't love carrots? I served our chickpea curry tonight with steamed cauliflower tossed in virgin coconut oil, and even my pickiest eater cleaned his plate.


INGREDIENTS:
3 cups cooked chickpeas or 2 cans organic garbanzo beans
1 medium yellow onion, finely diced
1 1/2 cups diced carrots (about 3 medium)
4 Roma tomatoes, quartered
5 cloves garlic, peeled
2 inch chunk fresh ginger, peeled and roughly chopped
3 tbsp extra virgin olive oil
1 tsp cumin seeds
1 tsp brown mustard seeds
1 tsp ground cumin
1/2 tsp ground coriander
1/2 tsp turmeric powder
1 1/2 tsp sea salt
scant 1/2 tsp freshly ground black pepper
1 cup filtered water
1 tbsp fresh lemon juice
1/4 cup chopped fresh cilantro
DIRECTIONS:
Place the olive oil, cumin seeds, and mustard seeds in a large, heavy pot or Dutch oven with a tight fitting lid. Turn the heat onto medium, letting the oil and whole spices heat up until the mustard seeds start to pop. Once they start popping, immediately add your diced onion and quickly give it all a stir to prevent the seeds from burning. Now reduce the heat to medium low, and brown the onions, stirring frequently to ensure that they don't burn. This can take 10-15 minutes, but be patient! The rich flavor that the browned onions provide this dish is absolutely worth the wait.


While your onions are browning, puree your tomatoes, garlic, and ginger in a blender or food processor. I used my blender, and got almost 2 1/2 cups of puree.


Once your onions have properly browned, add the pureed tomato mix, diced carrots, garbanzo beans, ground cumin, ground coriander, turmeric, salt, and pepper to the pot. Stir well, and allow everything to simmer over medium heat for about 5 minutes, stirring frequently.


Next, stir in the water and reduce the heat to your lowest setting. Cover your pot, and simmer for 30-45 minutes, or until your carrots are tender. Be sure to stir your curry occasionally to prevent the ingredients from sticking to the bottom of the pot.

Once your carrots are properly fork tender, turn off the heat and stir in the lemon juice and chopped cilantro. Do a taste test, and add more salt if you wish.


Enjoy your chickpea curry with rice, steamed cauliflower, quinoa, or roasted sweet potatoes. It's delicious with just about anything!

This was a hearty and satisfying vegan meal for us tonight. What is your favorite vegetarian dinner?

Dragonfruit Dream Smoothie (vegan + gluten free)
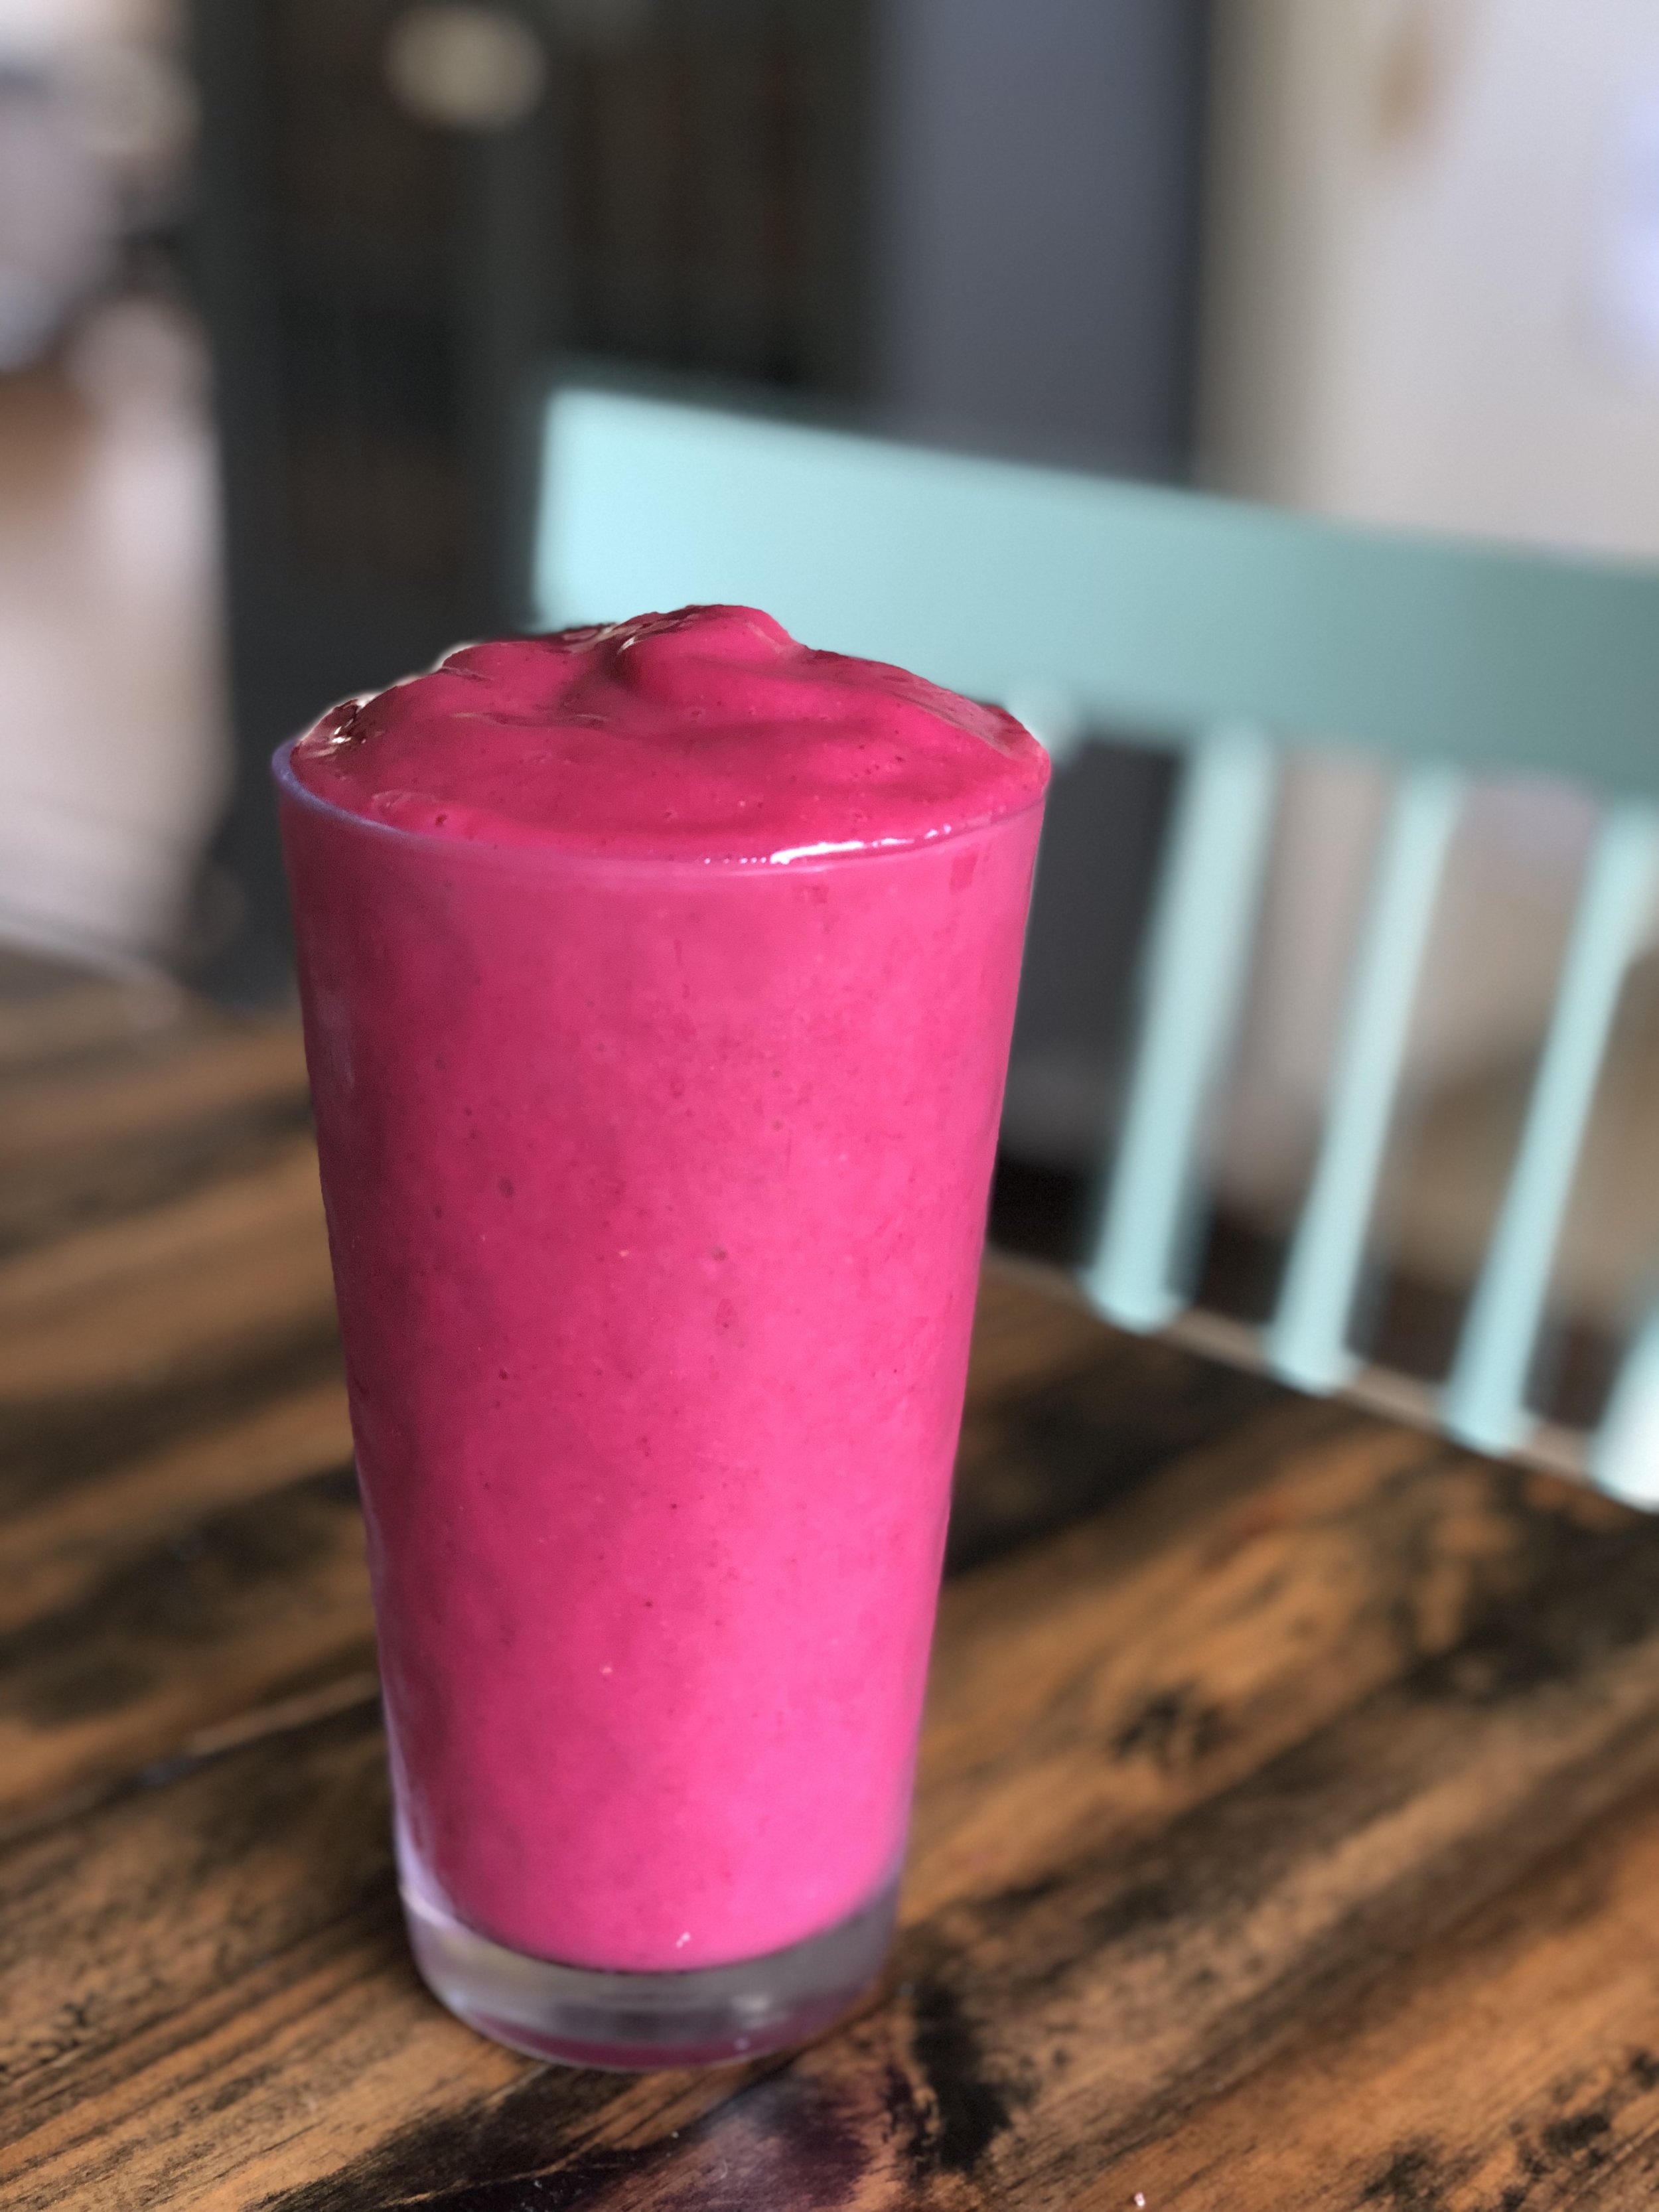
Ever since I did the Medical Medium’s 3-6-9 Liver Rescue Detox a few months ago I have been obsessed with dragonfruit. I love it for its mild berry-like flavor, its potent antioxidant content, its liver-supportive properties and honestly, most of all, its gorgeous color! To beat the heat over the weekend I made up this fruity smoothie and we loved the combo so much that I had to share. It’s a refreshing mix of sweet + tart, it’s packed with vitamins, minerals, phytonutrients, and fiber and it’s anti-inflammatory to boot. Yes, please!
INGREDIENTS
1 packet frozen purple dragonfruit (you can also use fresh if available)
1/3 cup frozen mango
1/3 cup frozen strawberries
1/2 cup frozen wild blueberries
2 large kale or collard green leaves or a big handful of baby kale
1/2 inch chunk ginger
Squeeze of fresh lime
1/2 cup water
DIRECTIONS
Break apart the dragonfruit in the packet before emptying contents into your blender cup. Add the remaining ingredients and puree on high until smooth. Add more water to help it blend, if needed. Pour into your favorite cup and enjoy! Serves 2-4.

Banana Walnut Bread (gluten free & vegan)

I had a major craving for banana bread the other day, but didn’t have a recipe that I love so I checked out my go-to site for gluten free baked goods, Sarah Bakes Gluten Free. I didn’t have all of the ingredients that her recipe calls for so I did a little experiment with what I had on hand, made a few adjustments and voilå- it worked! I used Bob’s Red Mill All Purpose Gluten Free Flour because that’s all I had in my pantry. I also used organic vegetable shortening to keep the bread as light in texture as possible- not always so easy when baking both gluten free and vegan. Unlike most gluten free breads, my recipe does not call for xanthan gum which can be irritating to the gut and cause bloating and stomach upset. I enjoyed a couple pieces with some Irish butter and it really hit the spot!
P.S. While this recipe is both gluten free and vegan, I wouldn’t say that it’s 100% healthy. It’s definitely healthier than traditional recipes which call for refined sugar, but I recommend enjoying it as a treat- in moderation and after you’ve already balanced your blood sugar with a proper meal.
INGREDIENTS
Dry Ingredients:
1 1/4 c brown rice flour
3/4 c tapioca starch
1 tsp baking soda
1/2 tsp baking powder
1/2 tsp salt
Wet Ingredients:
1/2 c coconut sugar
2 tsp vanilla
3 medium bananas, mashed
1 tbsp apple cider vinegar
3 tbsp water
1/4 c coconut milk drink, room temp
1/4 c organic vegetable shortening, melted
Stir in at the very end:
1/2 c walnuts, chopped
DIRECTIONS
Preheat oven to 350 degrees. Line an 8x8 square Pyrex baking dish with parchment paper.
Whisk dry ingredients together in a medium bowl, breaking up any clumps.
Stir wet ingredients together in a large bowl until smooth.
Pour dry ingredients into wet mixture and stir until combined.
Stir in walnuts.
Pour into 8x8 glass baking dish lined w parchment.
Bake at 350 degrees for 22-25 minutes or until a toothpick inserted in the middle comes out clean and the top is slightly cracked and lightly browned.
Allow to cool in the pan for 20 minutes then transfer to a cooling rack and let cool completely before slicing.
Store in an airtight container.

Perfect Balsamic Vinaigrette (gluten free, vegan)

One of my favorite ways to make sure that I get enough veggies everyday is by keeping a big box of pre-washed salad greens in my fridge (arugula and baby kale are our go-to’s) along with a jar of yummy homemade dressing. I made this (perfect) balsamic vinaigrette last week and I have been loving it drizzled over a bed of greens, chopped cucumber, red bell peppers, fresh cilantro (my favorite) and organic turkey. Sometimes I throw some organic Kingdom white cheddar on there too if I’m feeling bold (I buy it at Costco). This dressing is tangy, slightly sweet and whips up in the blender in a matter of seconds. Enjoy it on both raw and cooked veggies, tossed with garbanzos and fresh herbs, or as a marinade for meat or tofu.
INGREDIENTS
1/2 cup extra virgin olive oil
1/4 cup balsamic vinegar
1 tbsp Dijon mustard
1 tbsp fresh lemon juice
1/2 clove garlic
1/4 tsp Himalayan pink salt
1 tsp fresh lemon zest
5 turns of the pepper mill
DIRECTIONS
Place all ingredients into the blender and process until completely smooth. Store in a tightly covered glass jar in the fridge.

Garlicky Chickpeas with Artichokes & Greens (gluten free, dairy free)

I’ve been making a version of this dish for many years, and what goes into it often depends on my mood and truthfully, whatever ingredients I have on hand. Before we had kids Ben and I would eat it over pasta with lots of freshly grated parmesan, and then we ditched the cheese and pasta and it became our favorite thing to take to the beach when we moved to Hawaii. Lately It’s been one of my go-to dishes for potlucks, and a couple of weekends ago I think it reached a new level when I was making it to take to a friend’s house and discovered that I only had one can of chickpeas (gasp!). So I tossed in quartered artichoke hearts and I have to say that the addition of those liver-healthy nuggets inspired some pretty amazing mouth-sounds from the hostess. True to form I used kale as my greens and added plenty of chopped up bacon, but you can use any hearty green or even spinach and omit the bacon to make this 100% plant based. I usually employ canned organic chickpeas for this recipe because it’s often a last minute deal, but feel free to use homemade beans instead. Either way, I hope you try it and love it!
INGREDIENTS:
3 tbsp extra virgin olive oil
One 14 oz can garbanzo beans rinsed and drained (go for organic and look for a BPA free can) or about 2 cups cooked
4 large cloves garlic, minced
Zest of one lemon
1/4 -1/2 tsp red pepper flakes (to taste)
2-3 big handfuls chopped kale, collards, or spinach
6-8 slices of nitrate & nitrite free bacon, cooked until crispy and chopped (omit for plant based)
1 14 oz can artichoke hearts, water drained and hearts quartered
1/4 cup each of chopped fresh cilantro and fresh parsley
Juice of one lemon
1/2 tsp-1 tsp Himalayan pink salt, to taste
DIRECTIONS:
Heat the olive oil in a large saucepan or skillet over medium-low heat. Stir in the garbanzo beans and the garlic and cook for about 5 minutes until the garlic is fragrant but not burned.
Add the lemon zest, red pepper flakes, and chopped greens and saute until the greens have wilted.
Stir in the artichoke hearts and bacon and toss gently to combine, allowing the artichoke hearts to warm through. Turn off the heat.
Add the fresh herbs, lemon juice, and salt to taste. Toss gently to combine and do a taste test. Add more extra virgin olive oil if it’s too tart or too dry. Adjust the salt or red pepper flakes if you want more of a punch. This recipe is really delicious and packs a ton of flavor, so if you’re not feeling it then make whatever alterations you need to really love it! Serve warm or at room temperature.

Grannies, Beets & Lacinato Kale Salad (vegan, paleo)

One of my favorite things about the summer season is getting together with family and friends, and all of the delicious food that goes along with it! I love having a few go-to salads in my back pocket for picnics and barbeques that I know I can execute perfectly, even at the last minute. This Beet, Kale, and Granny Smith Apple Salad features crisp, fresh flavors that are just perfect for a hot summer day. Roasting the beets really brings out their sweetness, and my tangy Honey Mustard Dressing ties everything together into perfect harmony. You can easily make this ahead of time by prepping each component separately a day or two in advance, and then just toss everything together right before serving.
INGREDIENTS:
Honey Mustard Dressing:
1/4 cup extra virgin olive oil
2 tbsp fresh lemon juice
1 1/2 tbsp Dijon or stone ground mustard
3 tsp honey
1/4 tsp salt- more or less to taste
5 turns of the pepper mill
1/2 tsp minced garlic
1/2 tsp grated fresh ginger
Combine all of the ingredients in a blender, or whisk by hand, and set aside. This dressing can be made several days in advance, and stored in an airtight container or mason jar in the fridge.

For the salad:
1 tbsp extra virgin olive oil, for roasting the beets
1/4 tsp sea salt
freshly ground black pepper
1 large or 2 small red beets, peeled and thinly sliced into 1/4 inch thick half rounds
1 large Granny Smith apple, cored and cut into 1 inch cubes
1 bunch of Lacinato kale or green curly kale, ribs removed
1/4 cup Honey Mustard Dressing
Start by tossing your sliced beets in the extra virgin olive oil, sea salt, and a little freshly ground black pepper. Make sure each piece is well coated, then arrange the beets in a single layer on a baking sheet lined with parchment paper. If you are using a large beet, you may want to cut the half moons into quarters, so that the pieces aren't too big. Roast the beets at 350 degrees for 25-30 minutes, until fork-tender. Remove from the oven, and let cool while you prepare the rest of your ingredients.

Whether you are using Lacinato kale, or regular curly kale, you’ll want to first rinse the leaves well, checking for any little critters that might be hiding on the back of the stalks. Shake off the excess water, then remove the tough ribs. Discard the ribs, roughly the chop the leaves into bite sized pieces, and place the cut kale in a large mixing bowl. If you have a lot of excess water left on the kale, you can pass it through a salad spinner or use a clean kitchen towel or paper towels to remove the water.


Drizzle the kale with 1/4 cup of your prepared dressing, then get your hands in there and gently massage the leaves to break down the tough fibers. Add in the chopped apple, toss to combine, then add in the cooled roasted beets, and toss again, making sure that the beets and apples are well coated with the dressing. You can add more dressing to the mix if necessary.


Do a taste test, and add more dressing, lemon juice, or seasoning if needed. Enjoy immediately, or cover tightly, and store in the fridge for later. If you want to make this salad a day ahead of time, I recommend tossing the cut apples in a little bit of lemon juice to prevent them from browning. To preserve the crispness of the kale and the apples, I would prep and store each component separately, then assemble the salad right before serving, to prevent the kale from getting soggy.
I hope you love this salad as much as I do!
With Aloha,
Fauzia
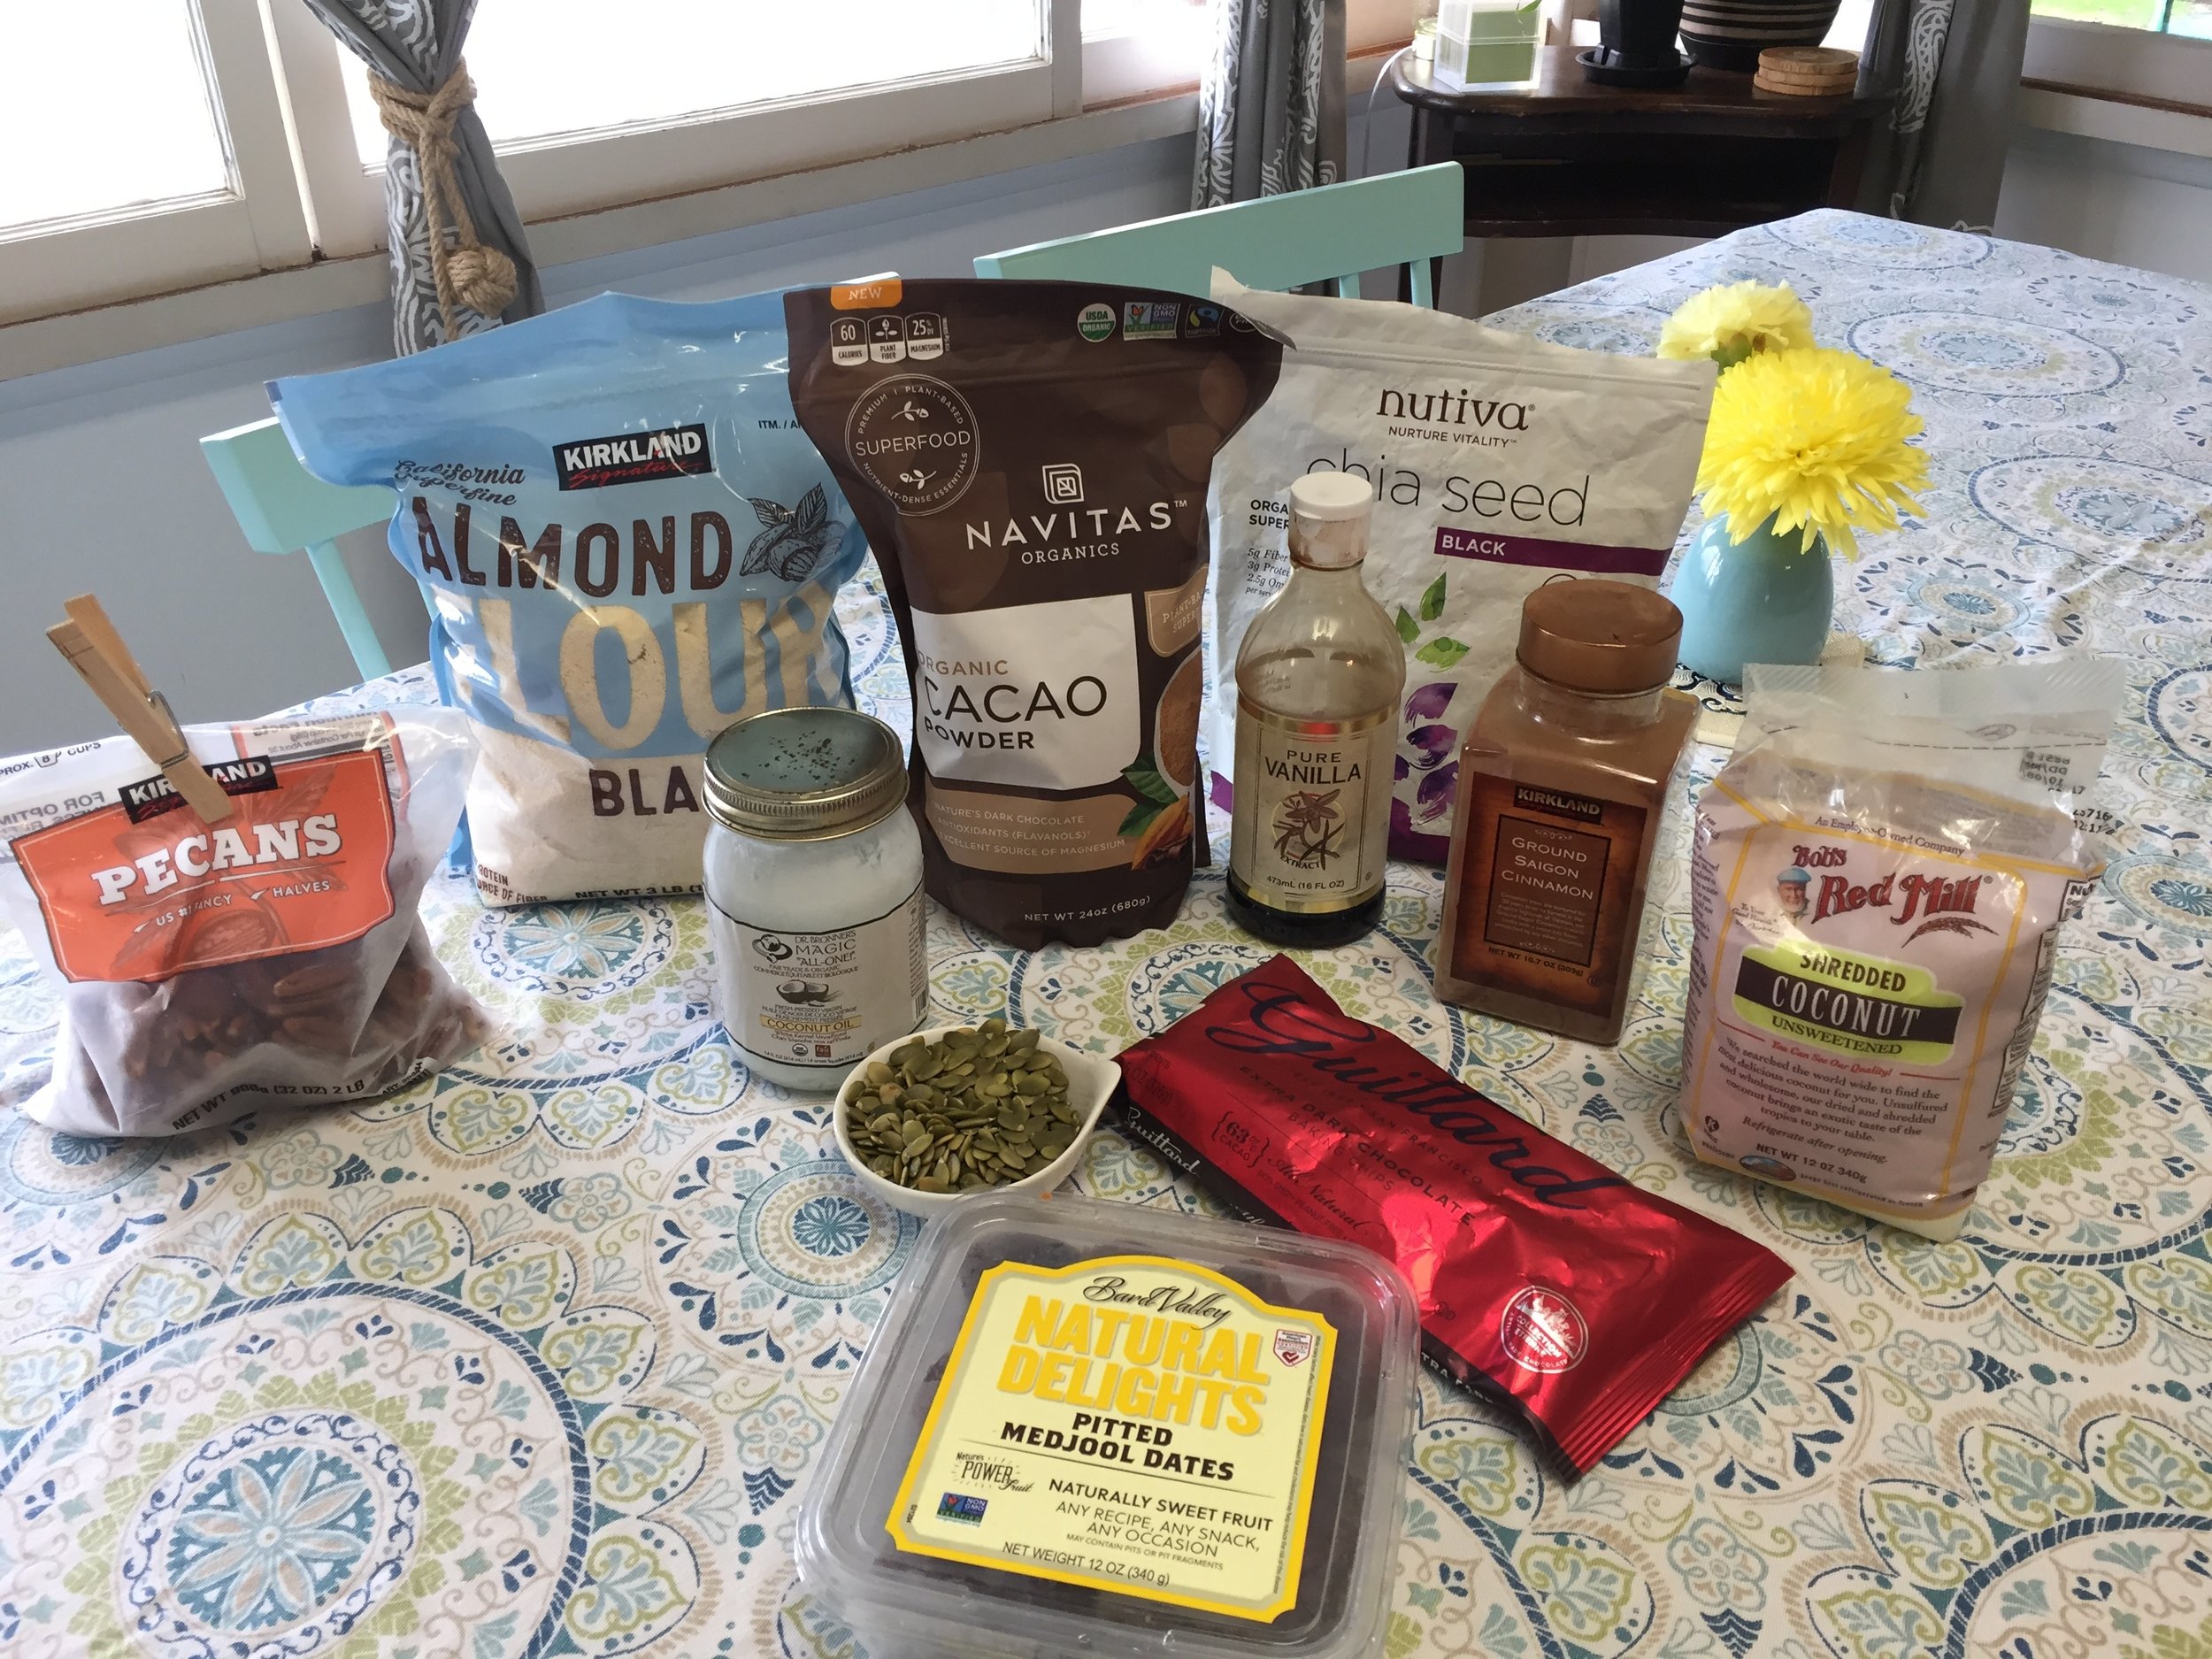
Fauzia’s Everything’s Good Energy Bars (vegan, paleo)

I love these bars for so many reasons. They are healthy and delicious, and full of fiber, protein, healthy fats, minerals, and dark CHOCOLATE! I call them Everything's Good Bars because everything in them is good for you, and they serve as a little reminder that life is good. These guilt-free gems take less than 10 minutes to whip up, and make a perfect breakfast on the go, or a nutritious snack for anytime of the day. Feel free to switch up the ingredients to suit your personal taste. Walnuts, ground flax seeds, dried cranberries, unsalted pistachios, and sunflower seeds would be great additions.
INGREDIENTS
8 large Medjool dates, pitted
1/2 cup raw pecans
1/2 cup almond flour, or 1/2 cup raw almonds
1/3 cup raw pumpkin seeds
2 tbsp chia seeds
1/4 cup unsweetened shredded coconut
2 tbsp unrefined coconut oil
2 tbsp unsweetened cocoa powder
2 tsp pure vanilla extract
1 tsp ground cinnamon
1/3 cup 63% or higher dark chocolate chips (add these at the very end)
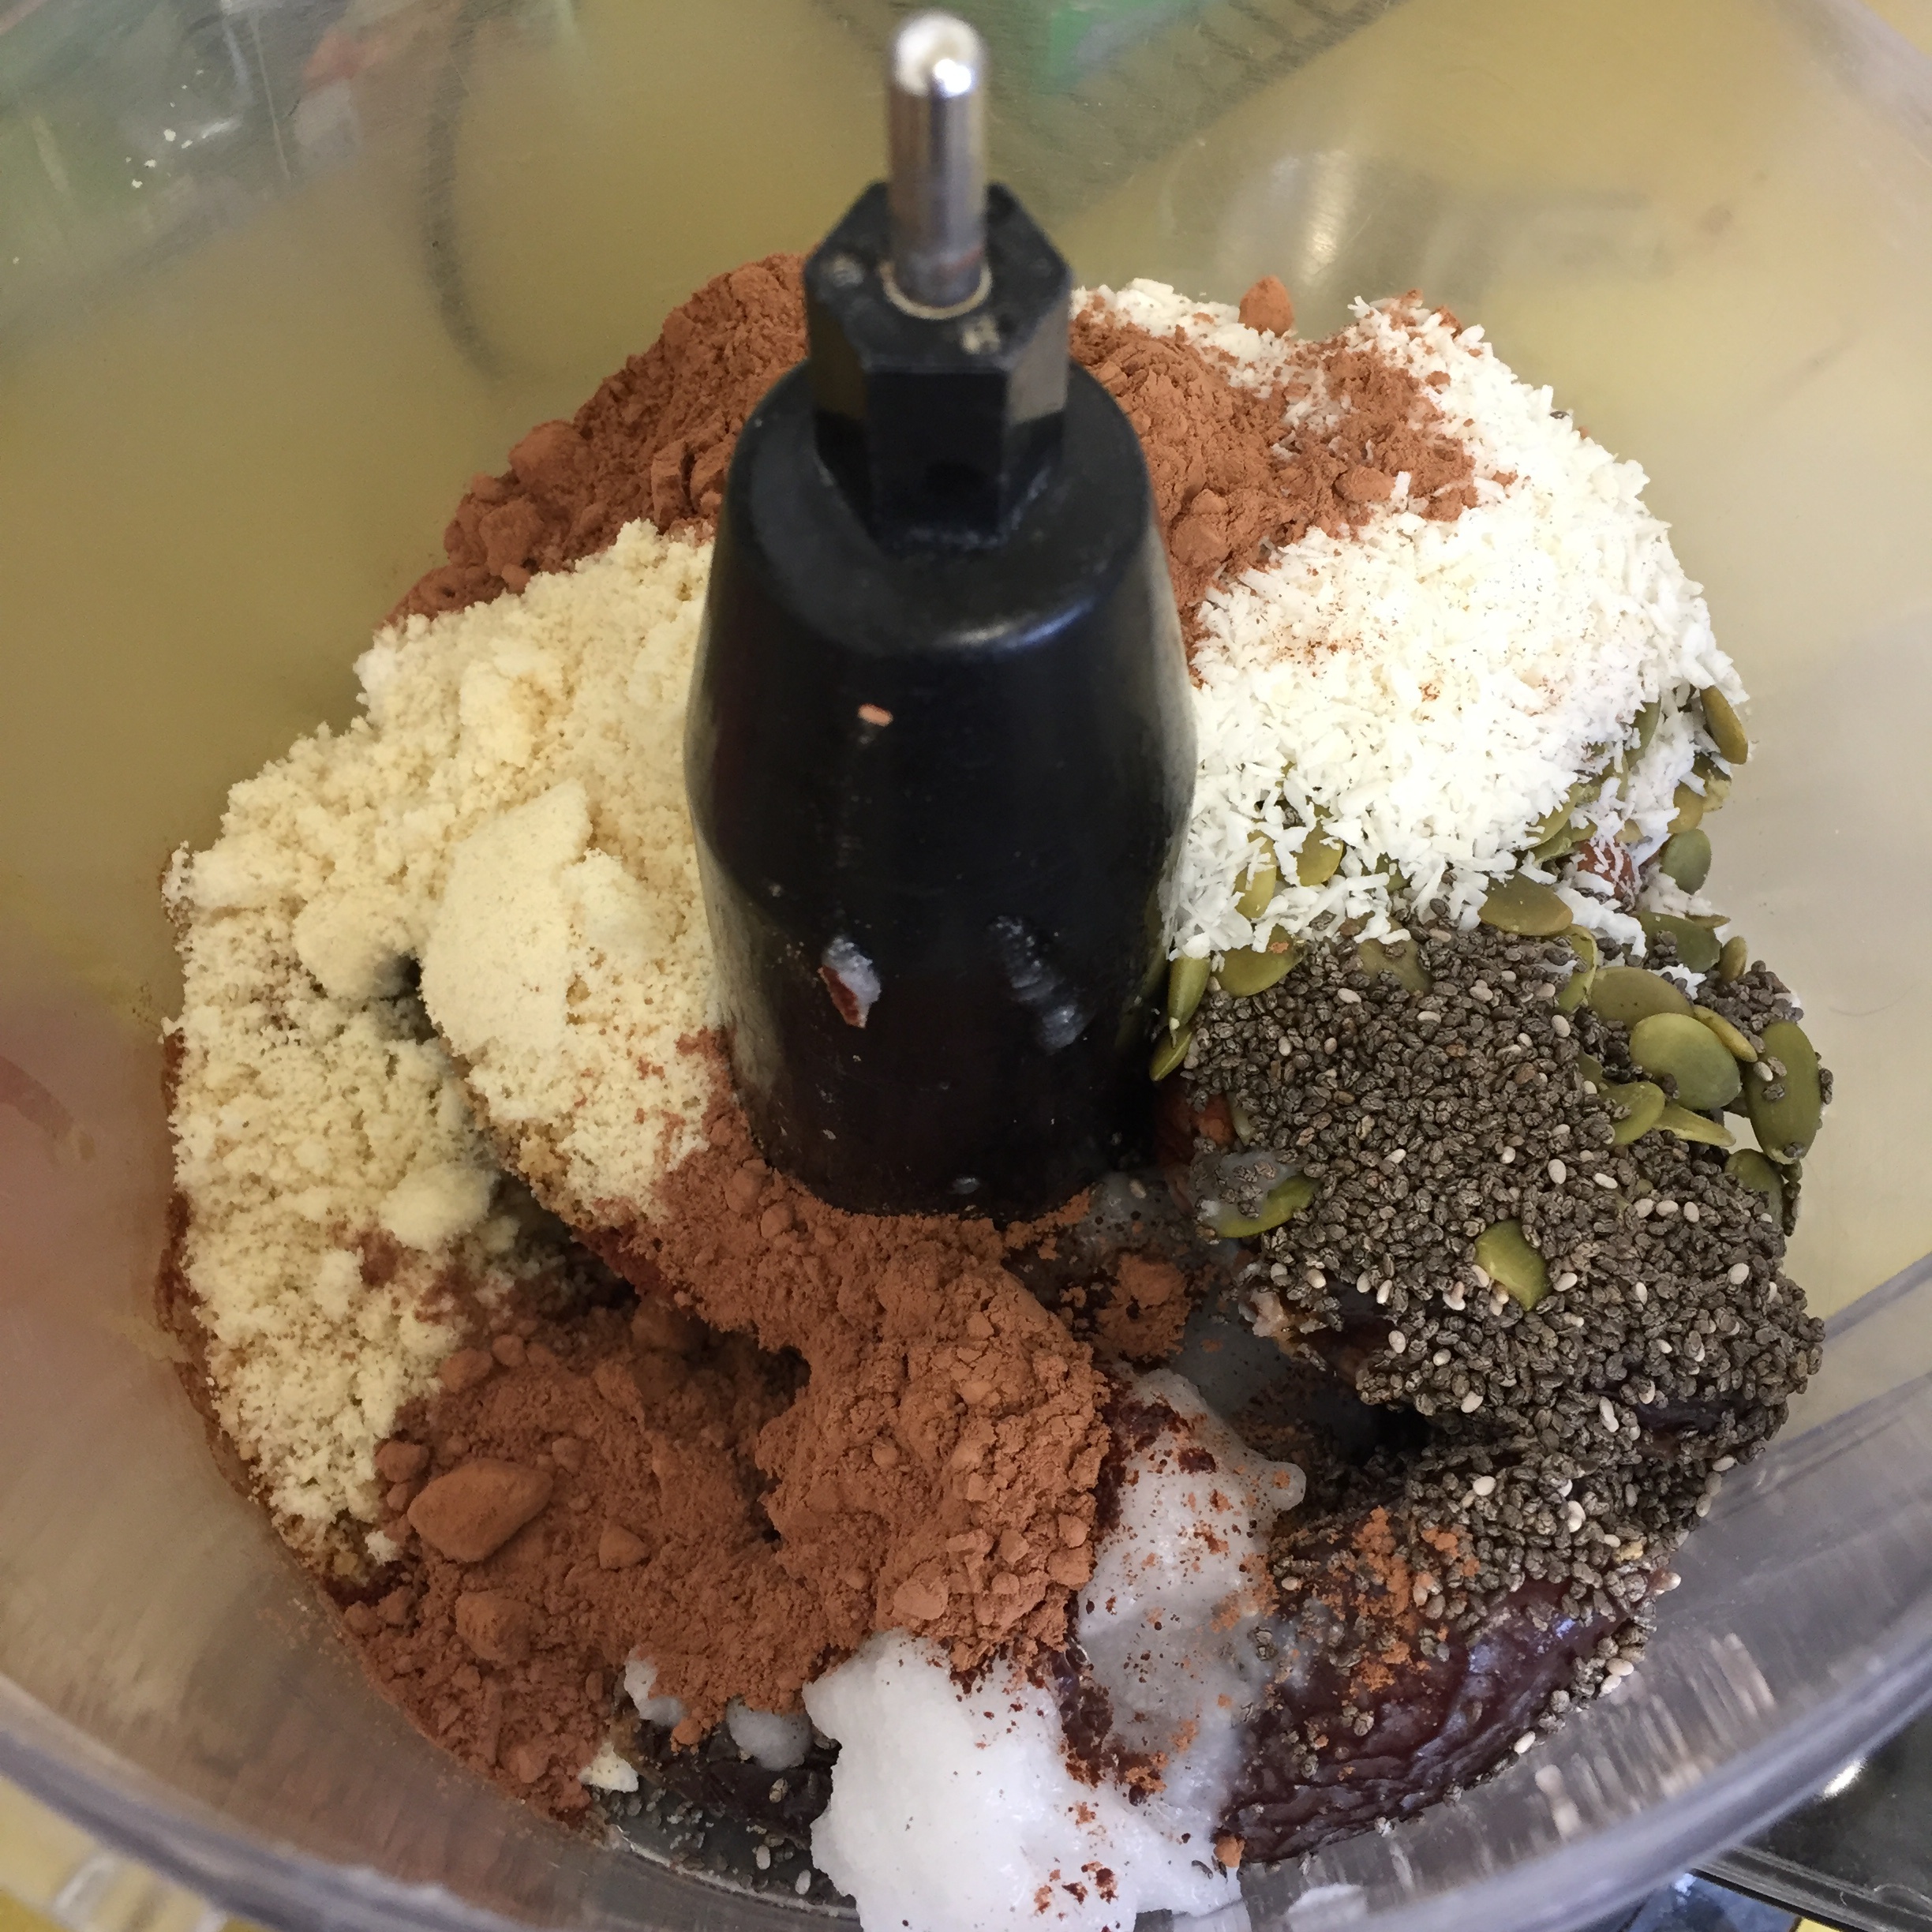
DIRECTIONS:
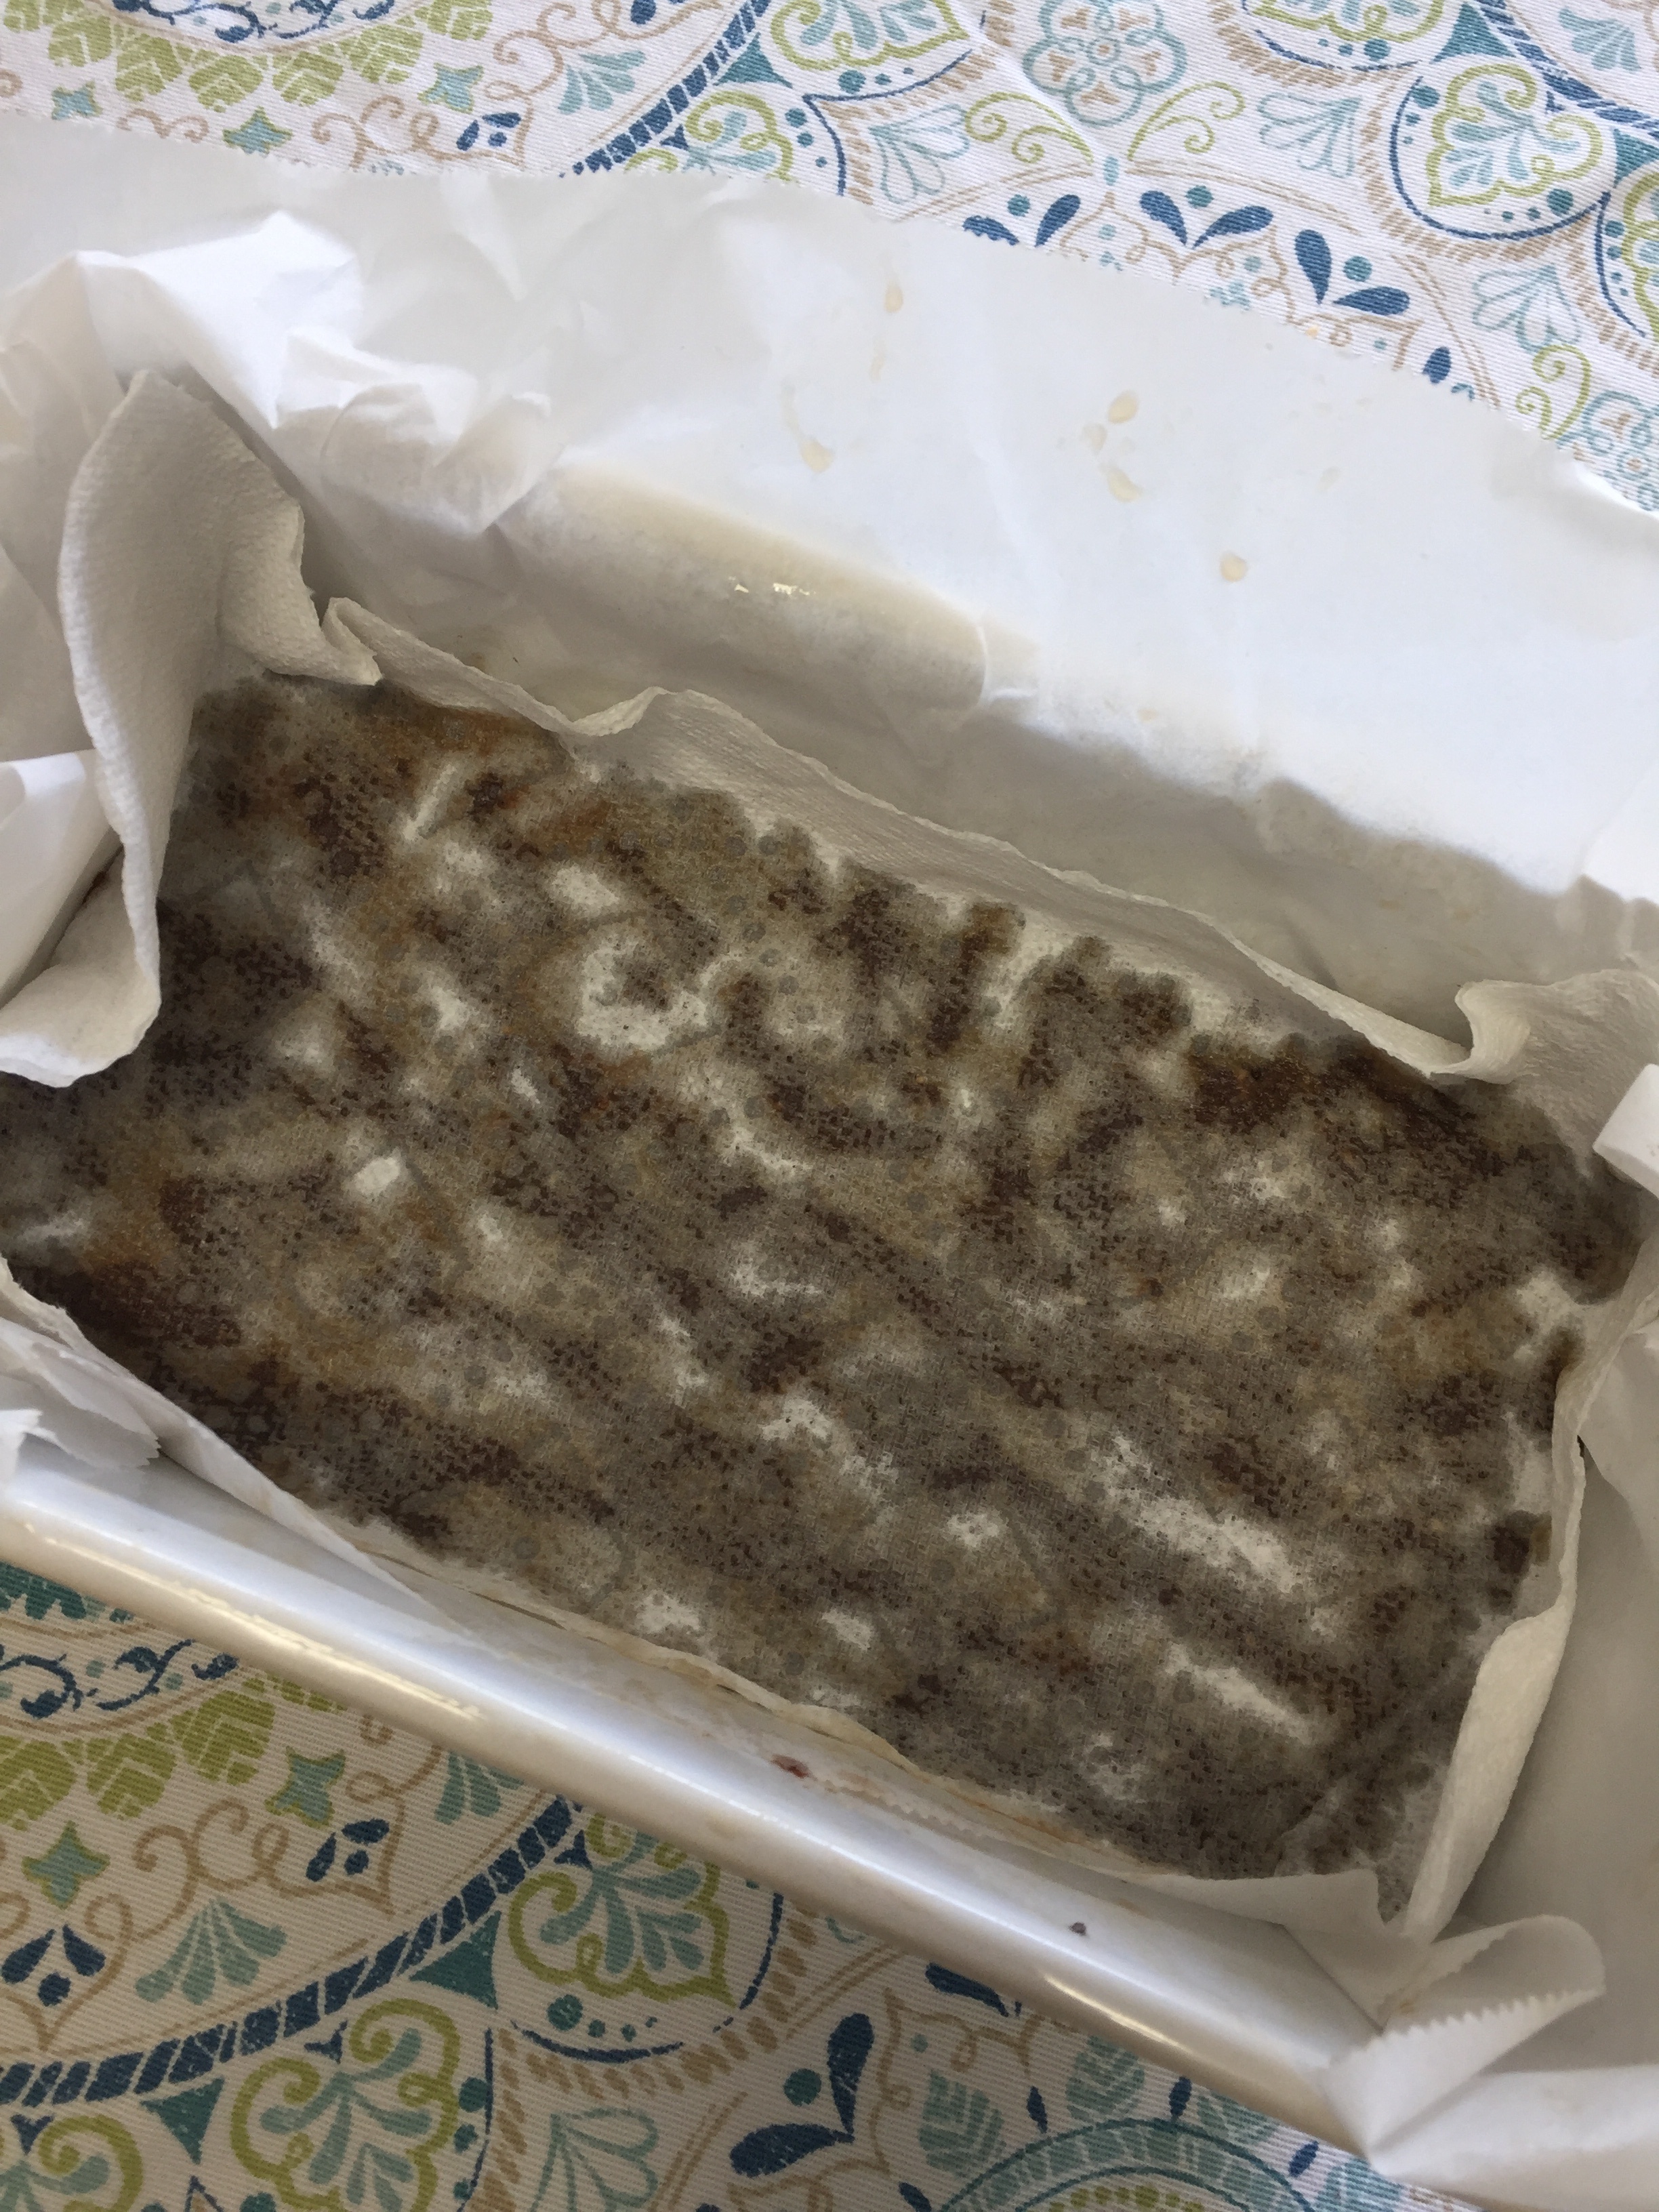
1. Line a standard loaf pan with parchment or waxed paper, leaving an excess on at least 2 sides so that you can lift the set bars out of the dish before slicing.
2. Place all ingredients except for the chocolate chips in a standard size food processor (mini food processors aren’t big enough for this recipe, and a blender doesn’t quite do the job).
3. Turn on and process for about 3 minutes, until it starts to come together to form a dough.If you are using whole nuts like almonds or pistachios, I recommend running those through the food processor alone to chop them up before adding the rest of the ingredients.
4. Add in the dark chocolate chips, and pulse 3 times to incorporate, but don’t over mix.
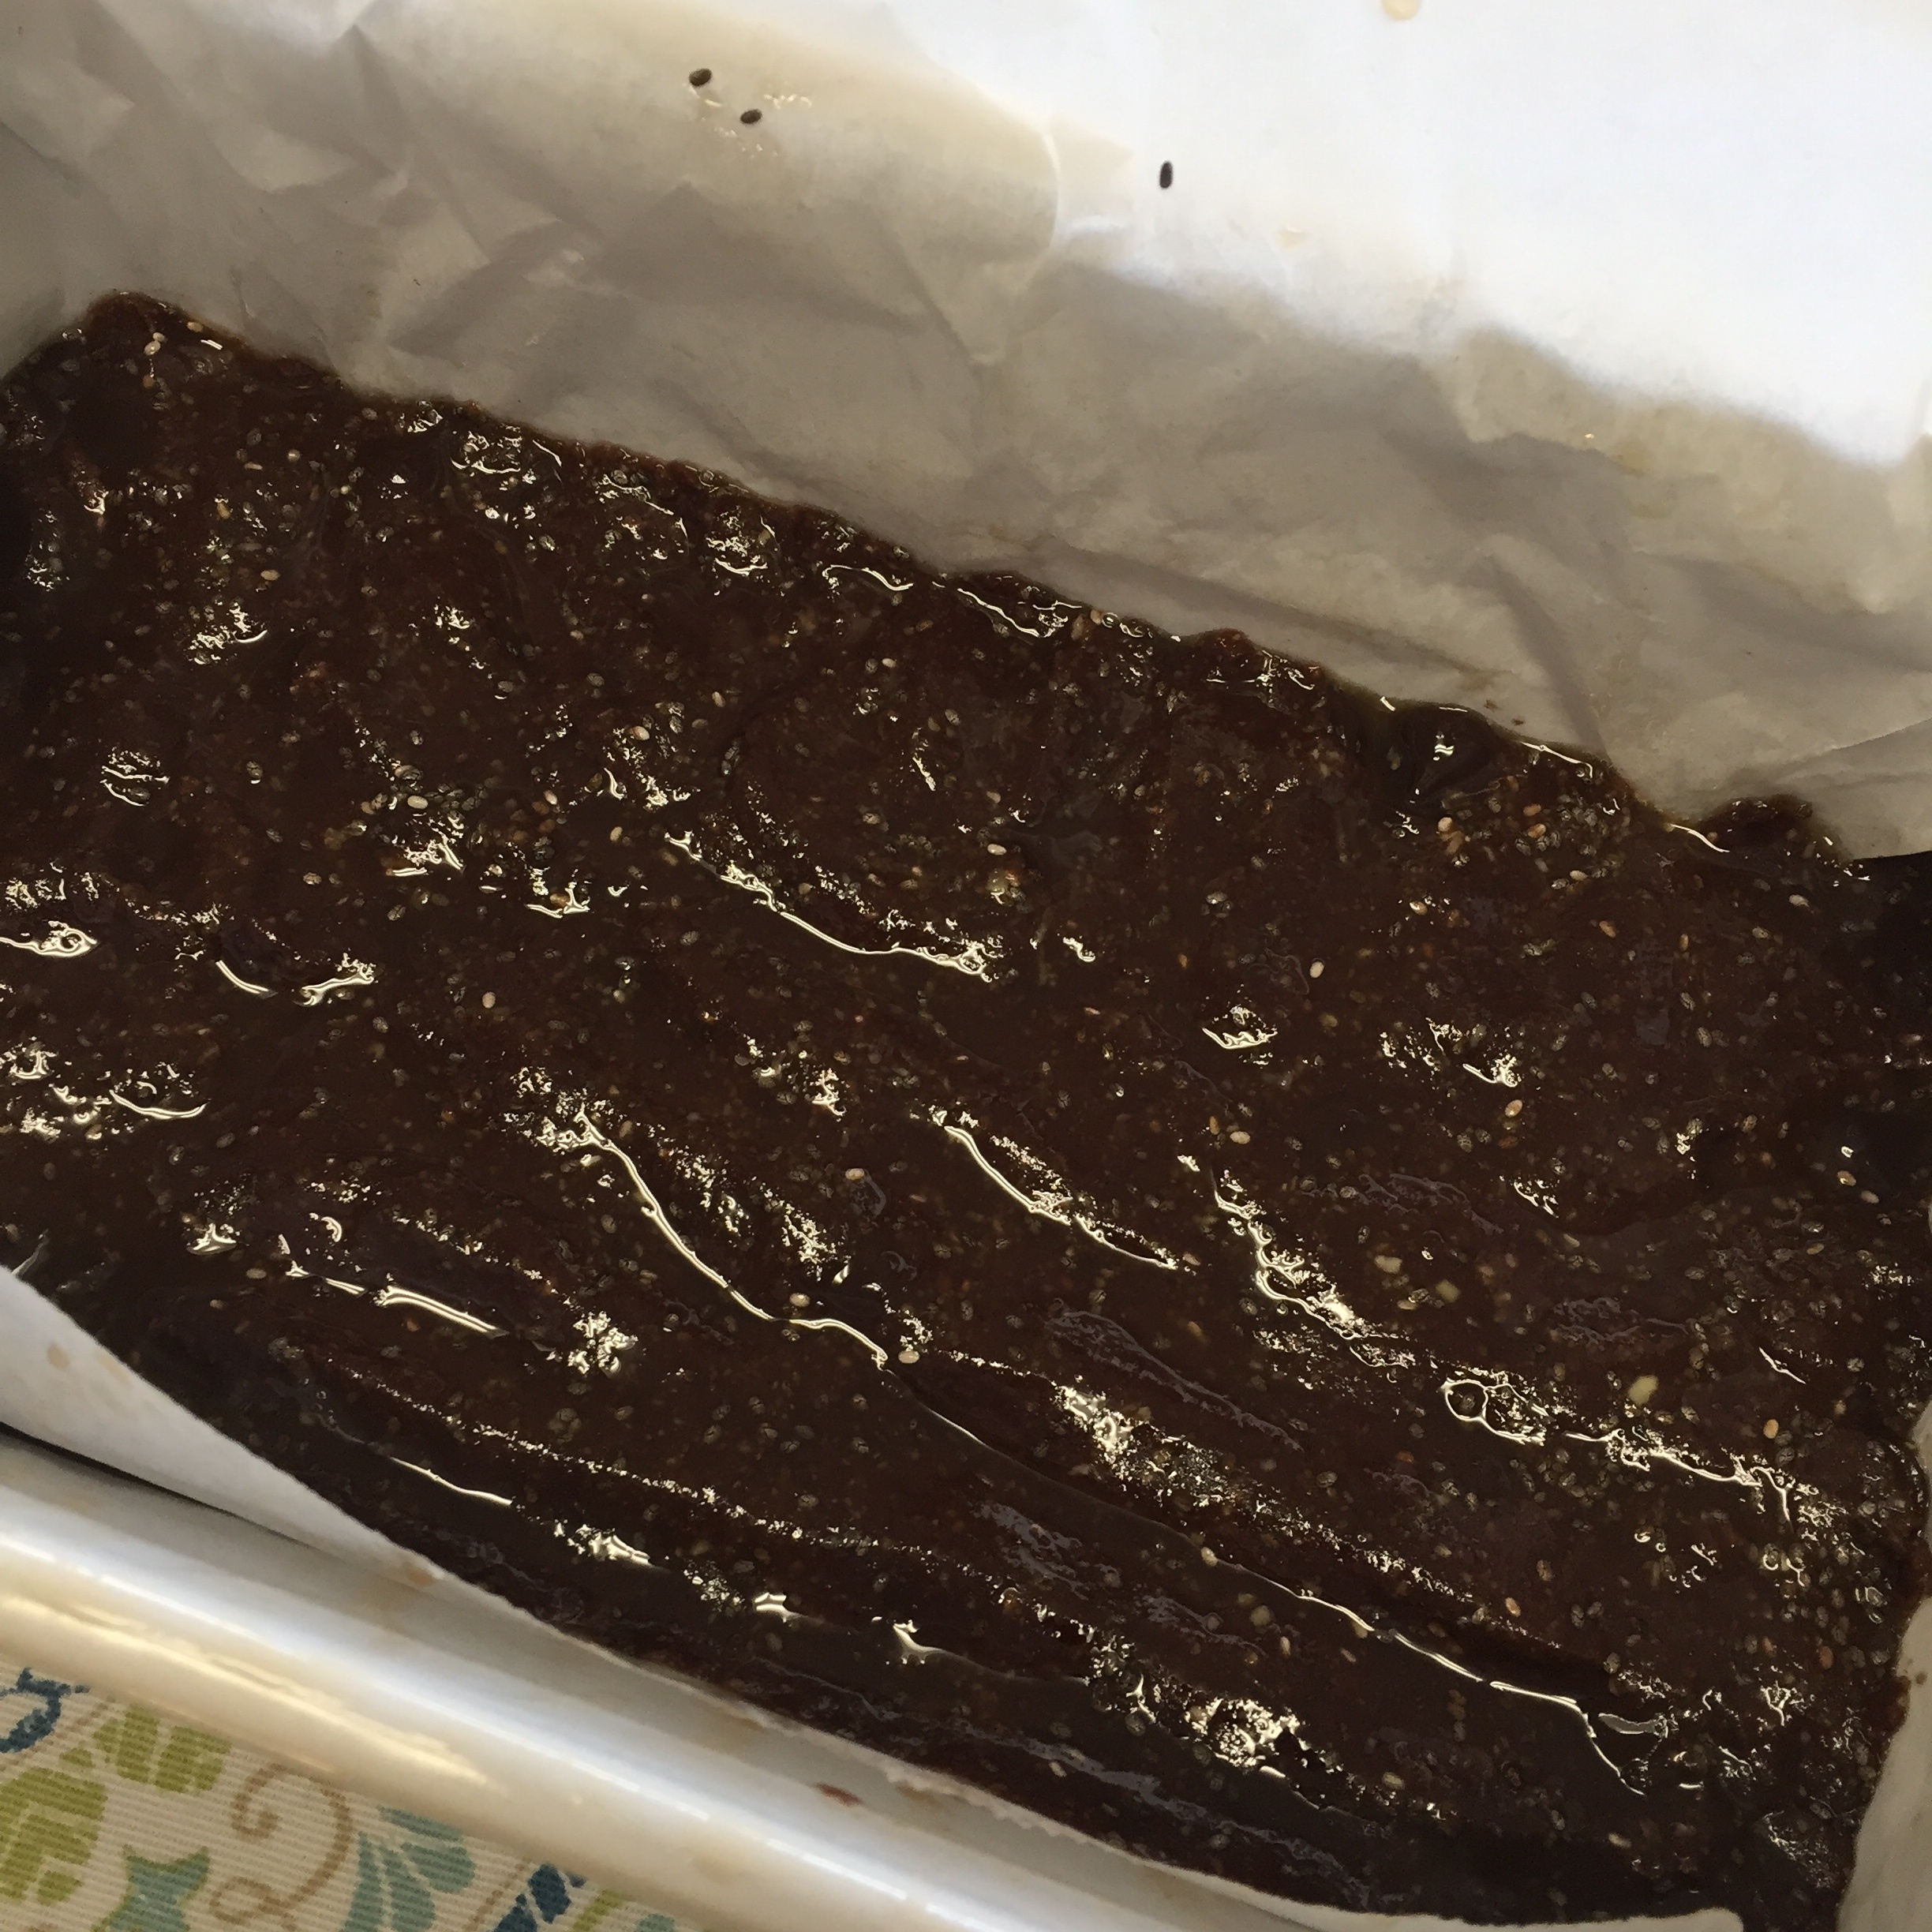
5. Turn the mixture out into the lined dish, and press the dough down gently with your fingers until it is mostly uniform and even.
6. Gently press a clean paper towel on the top of the dough to absorb the excess coconut oil that has collected on the top of the pressed mixture.
7. Place in the freezer for an 30 minutes to an hour for a quick set, or in the fridge for 2 or more hours.
8. Remove the entire bar slab by pulling up the sides of the parchment or waxed paper.Place on a cutting board and use a large knife to cut into bars or squares, and store in an airtight container in the fridge for up to 2 weeks, although I doubt they will last that long! They are best served cold, especially in a warm climate. Keep them close to a cold pack while you're out and about, and you'll be set.


Double Chocolate Pecan Cookies (vegan, paleo)
These Double Chocolate Pecan Cookies are rich, decadent, perfectly chocolatey and they happen to be loaded with healthy fats and fiber, too. A little crispy on the outside and chewy on the inside, they feature ground pecans in place of flour, maple syrup instead of refined sugar and they get their richness from coconut butter. The ingredients are quite different from traditional cookies, but they are just as delicious and I find them to be far more satisfying. They are a fantastic way to treat yourself to something sweet without that feeling of total sugar overload.
And if you are looking for a fun gift idea for friends and family, why not make an extra batch (or three!) to give away? Once your cookies have completely cooled you can stack them in these adorable jelly jars, and seal them off with some cute fabric and a handwritten label. I don't know anyone who doesn't love receiving a handmade, from-the-heart gift- I know I certainly do!
Prep time: 20 minutes Bake time: 8 minutes Yields: about 20 cookies
INGREDIENTS
1 cup ground pecans, lightly packed
2 tbsp tapioca starch
2 tbsp unsweetened cocoa powder
1/4 tsp baking soda
1/8 tsp fine sea salt
1/4 cup coconut butter or coconut manna (not coconut oil)
3 tbsp maple syrup, room temperature
2 tsp vanilla extract
1/2 cup semisweet or dark chocolate chips
DIRECTIONS
Preheat the oven to 350 degrees, and line two baking sheets with parchment paper.
Grind pecans in a food processor or dry container of a Vitamix. It doesn't need to be ground as fine as flour, and some little chunks are fine. Set aside.
In a medium sized mixing bowl, whisk together the tapioca starch, cocoa powder, baking soda, and sea salt. Stir in the ground pecans and mix well. I like to use a fork or whisk for this step.
In a separate bowl, mix the maple syrup, coconut butter, and vanilla until smooth. Be sure to stir the coconut butter before measuring it out, and also make sure that the maple syrup is at room temperature. If your mixture is a little chunky, you can warm it up by setting the bowl in a larger bowl of hot water, or by placing it in the microwave for about 20 seconds.
Pour the wet ingredients into the dry ingredients and mix until well combined. Stir in the chocolate chips.
Use a round tablespoon measure to scoop out the dough. Use your fingers to pack the dough into the measuring spoon, then gently nudge it out of the spoon and onto the baking sheet.
Use your fingers or palm to gently flatten the cookies. If some of the chocolate chips try to escape (they always do with this recipe), just tuck them back into the dough or press them onto the tops of the cookies. If you are planning to package your cookies in jelly jars, you'll want the cookies to be no more than 2 inches in diameter.
Bake for 8-10 minutes at 350 degrees, then let them cool completely on the pan. The bottoms should be slightly golden brown, but not burnt. My gas oven does the job in 8 minutes- if yours runs a little below temperature then you might want to leave them in for 10 minutes.
These are my all time favorite- enjoy!

Chai Spiced Pumpkin Custard (vegan, paleo)

If you have been craving something pumpkin and spice, but don't fancy yourself a baker, or just want to try something new, then this recipe is for you. My Chai Spiced Pumpkin Custard is rich, creamy, perfectly sweet and spicy, and it's filled with lots of fiber and healthy fats so you can feel great about indulging in this decadent treat. It's also incredibly simple to make. You just blend the ingredients and then pour into ramekins and let it set up in the fridge. No cooking, no fuss! My boys absolutely love this custard, and it's something that I am happy to give to them at any time of day. Whether you are looking for a new healthy dessert option for your family, or planning an autumnal meal for guests, I hope you enjoy this pumpkin deliciousness as much as we do.
Prep time: 10 minutes Makes 6 servings
INGREDIENTS:
1 cup full fat coconut milk, from the can (I used the Thai Kitchen brand)
2/3 cup + 2 tbsp pureed pumpkin
1/3 cup coconut butter or coconut manna (not coconut oil), room temperature
3 tbsp maple syrup
1 tsp pure vanilla extract
1-2 tsp chai masala* (purchase at a health food store or Indian grocery, or check out my recipe here)
pinch of fine sea salt
*You can use pumpkin pie spice in place of the chai masala, or make your own spice mix by blending 1/2 tsp ginger, 1/2 tsp cinnamon, 1/8 tsp clove, 1/8 tsp cardamom, 1/8 tsp of nutmeg and a pinch of black pepper (all ground). Mix well, then measure out 1-2 teaspoons for your recipe, depending on how spicy you like your desserts.
DIRECTIONS:
Place 6 small ramekins or serving bowls on a tray, and set aside. My ramekins can hold 1/2 cup each, but I filled them with about 1/3 cup of custard to create 6 servings.
If your coconut butter or coconut manna has separated in the jar, you'll need to stir it before adding it to your recipe. To do this, close the lid tightly and place the jar in a bowl of hot water to allow it to soften for about 5 minutes, then carefully stir until the coconut solids and the coconut oil are completely blended.

Place all ingredients in a medium sized bowl and blend with a hand immersion blender until the salt has dissolved and the custard is completely smooth. If you don’t have an immersion blender you can puree the mixture in a standard blender until smooth.
Pour about 1/3 cup of your prepared custard into each ramekin. I used a measuring cup with a spout to achieve a clean pour.
Place your filled cups in the fridge, and allow the custard to set up for at least 4 hours. Cover with plastic wrap once it has set, to keep it fresh. It's best eaten within a few days, although I doubt it'll last that long!


Tangy Coconut Date Dip (vegan, paleo, AIP)

Today we threw a good old fashioned birthday party for Nikhil and Felix, who are both January born. The party was in the afternoon between lunch and dinner, so I put together an array of healthy and yummy snacks that all happened to be vegan, and gluten-free of course. This Coconut Date Dip is a little treat that I whipped up on Friday afternoon with ingredients I already had in my fridge and pantry. I served it with Granny Smith apple slices and it was a big hit at the party, especially amongst the parents. Sweet and tangy with complex notes of warm ginger and cinnamon, it boasts a great texture that would also work well as a spread for toast or crackers, paired with strawberries or pear, or just straight from the spoon for an energizing, fiber-filled bite. I'm not sure if my boys had a chance to try out this snack today (they were too busy having a blast with all of their pals), but I'm guessing they'd love it. I think I'll offer it up with crackers tomorrow after school. We'll see what they say!
INGREDIENTS:
1 cup dried unsweetened coconut
10 Medjool dates, pitted
3 tbsp fresh squeezed lemon juice or calamansi or sour orange juice
1 tsp ground ginger
1/2 tsp ground cinnamon
1/2 cup water
Pinch of fine sea salt
Place all ingredients in a food processor fitted with an "S" blade, and blend until a thick paste has formed. If your Medjool dates are a bit dry or tough, you can soften them up by soaking them in a bowl of hot water for 5 minutes before adding to the food processor. Store in an airtight container in the fridge for up to 5 days. For best taste and texture, let your dip come to room temperature before serving.
Enjoy!


Cinnamon Raisin Cookies (vegan, paleo, nut-free)

Happy Monday, everyone!
Hurricane Ana brought us a weekend full of non-stop rain, and the cool, grey weather put me in a baking kind of mood. Yesterday afternoon I made a batch of these divinely aromatic cookies, and I thought this would be the perfect time to share my newest recipe with you all.
Crisp on the outside, and chewy on the inside, my Cinnamon Raisin Cookies are so good for so many reasons. For the past month I have been working on a cookie that is Paleo, vegan, and nut-free, and I was pleased when this recipe turned out perfectly.
Free of eggs, dairy, grain, tree nuts, refined sugar, and gluten, these yummy bites are exactly what I was hoping for. When I did food allergy testing about 6 years ago, it was eggs and almonds that came up as my two biggest offenders, and I have many friends and family members who also avoid nuts, so I wanted to come up with a baked treat that we can all enjoy without triggering a negative immune response or digestive upset.
Instead of relying on almond flour, which is the most commonly used flour in Paleo baking aside from coconut flour (which requires the use of eggs), my Cinnamon Raisin Cookies feature a base of ground raw sunflower seeds and dried unsweetened coconut. Low in sugar, but rich in fiber, protein, and healthy fats, I feel great about giving these to my boys at any time of the day, and I rely on them for an energy-packed snack for myself. They are also the perfect companion to a cup of tea at the end of the day.
If you aren't crazy about raisins, feel free to use any type of dried fruit instead (I avoid ones with added sugar), or turn these into chocolate chip cookies by using a half cup of chopped dark chocolate chips in place of the raisins. Don't be intimidated by the use of ground raw sunflower seeds- you can easily grind them yourself at home using your food processor or a clean spice grinder.

Yields about 2 dozen cookies
DRY INGREDIENTS:
1 1/2 cups finely ground raw sunflower seeds (make sure they are not roasted or salted)
1/2 cup dried unsweetened shredded coconut
3/4 tsp ground cinnamon
1/2 tsp baking soda
1/4 tsp fine sea salt
WET INGREDIENTS:
2 tbsp pure maple syrup
1/4 cup plus 1 tbsp unrefined virgin coconut oil, melted and cooled
3 tsp pure vanilla extract
1/2 cup raisins, roughly chopped
DIRECTIONS:
Preheat your oven to 350 degrees, and line a baking sheet with parchment paper.
First, grind your raw sunflower seeds in a clean, dry spice grinder or food processor. I have used both methods and found that the food processor is much easier. You can do a larger quantity at once, and the flour doesn't clump together, as it tends to do in the spice grinder. Fit your food processor with an "S" blade, and let it run for about 3 or 4 minutes until the seeds are finely ground. It's okay if the sunflower seed flour looks a bit grainy or mealy. It doesn't need to be superfine for this recipe.
Whisk all of the dry ingredients together in a medium sized mixing bowl, making sure there are no clumps. Make a well in the center of the bowl, and add the maple syrup, coconut oil, and vanilla. Stir well until everything is well combined, then add in your chopped raisins and mix well again. The dough should be quite sticky.

Scoop your dough by a packed tablespoon measure onto the lined baking sheet, using your finger to scoop the dough out of the measuring spoon. Make sure that you really pack the tablespoon so that the balls of dough that you turn out onto the baking sheet aren't full of air pockets. You don't want to have crumbly cookies in the end!

These cookies don't spread much when they bake, so you can fit 15 on a standard sized sheet.

Gently flatten the cookies with your fingers, leaving an inch between each pressed cookie.

Bake for 6-8 minutes until they are slightly golden brown, and crispy along the edges, being careful to avoid overdone cookies. Remove them from the oven and let the cookies cool for at least 5 minutes on the baking sheet before transferring them to a cooking rack. Allow your cookies to cool completely before storing them in an airtight container.

Note: Because it's so humid here I always store my baked goods in the fridge to maintain their freshness, and I love these cookies right out of the fridge. I've found that they stay crisp on the outside for a couple of hours after coming out of the oven, but they tend to lose that crunch after a while. I'm assuming it's because of the high humidity here, but I'm curious to know how yours fare in other climates!
Are your cookies green?!
Don't be alarmed if your cookies take on a slightly green hue and/or turn bright green in the middle. There's nothing wrong with your cookies- it's just due to a chemical reaction between the chlorophyll in the sunflower seeds and the baking soda. I've also found that my cookie dough turns green if I don't bake it right away (I'll sometimes make the dough ahead of time and refrigerate it to bake later). My boys love finding green inside their cookies.

I love getting your feedback! Do you have a favorite healthy go-to snack? I'm always looking for new snack ideas for myself and my boys.

Banana Lime Magic Bars (raw, vegan, paleo-friendly)

Aloha Everyone!
It has been almost 3 months since I last posted. Yikes! We've had a very busy (and beautiful) spring here in Honolulu, but now that it's almost officially summer, it feels like things are starting to slow down a bit. I created this recipe yesterday evening while my littlest one was taking an unexpected nap, and I am super excited to share it with you. Sweetened only with fruit, these tangy freezer bars are the perfect summertime treat for the whole family, and they are so easy to whip up. Ben and I each enjoyed one for dessert last night (they weren't ready until after the boys had gone to bed), and he loved them so much that he called them "magic." I think you'll feel the same!
PREPARE THE CRUST:
1 cup raw cashew meal (I bought mine at Trader Joe's, but you can easily grind raw cashews in your food processor to make your own)
or use 1 1/4 cup raw pecans or walnuts and grind them in the food processor or blender
7 soft Medjool dates, pits removed
2 tbsp virgin coconut oil, melted and cooled, plus more to grease the pan
1 tsp pure vanilla extract 1/4 tsp fine sea salt
Drizzle a little bit of coconut oil into a dry, 9x5 inch loaf pan. Spread it around with your fingers, then line the pan with a piece of parchment paper, allowing for extra paper on the sides (you will use the excess to pull the frozen mixture out of the pan). The coconut oil on the pan prevents the parchment from slipping around while you're trying to line the pan. Do your best to press the paper into the corners of the pan, making it as smooth as possible. Don't worry if it looks a little awkward.
Place all of your crust ingredients, including the 2 tbsp virgin coconut oil, into a food processor fitted with an "S" blade, and pulse until the ingredients are all well incorporated and you have a sticky, crumbly looking "dough." If you are making your own cashew meal, first grind the cashews, measure out exactly one cup, then add that back into the food processor with the rest of your ingredients.
Turn the dough out into your lined loaf pan, then use your fingers to press the dough into the bottom of the pan, creating your crust. You want to get the crust as evenly thick as possible. Put the pan into the freezer to allow to the crust to firm up, and get started on your filling.
FOR THE FILLING:
3/4 cup mashed ripe banana (I used 2 white apple bananas from my local farmers market, but regular bananas will work just as well).
3-4 tbsp fresh lime juice (you may want to add a bit more if using regular bananas, as apple bananas tend to be more tart)
1 tsp (packed) lime zest
1/2 cup raw coconut butter (I love the Artisana brand)
1 tbsp virgin coconut oil, melted and cooled
tiny pinch of fine sea salt
To prepare the filling, first mash the bananas with a fork until you reach a pureed consistency, then measure out 3/4 cup.
Place all ingredients into a bowl and process with a hand immersion blender until smooth. You can also use your regular blender to achieve the same result.
Remove the crust from the freezer. Pour the filling onto your prepared crust, then use a spatula to gently spread it out so that it's evenly distributed over the crust, taking care to avoid thin or thick spots. When you cut your bars after freezing, you want them to have a uniform thickness.
Put the pan into the freezer and let it all set up for at least 3 hours (it may take longer depending on how cold your freezer is). If you are going to leave it to freeze overnight, I suggest covering the pan tightly with plastic wrap to avoid freezer burn.
These bars are best served straight from the freezer. When you are ready to indulge, remove the pan from the freezer, let thaw for about 20 minutes then pull up on the sides of the parchment paper to remove your slab of goodness onto a cutting board, keeping the parchment paper intact.
Use a large, sharp knife to slice it into uniformly sized bars. You can make them as big or as small as you'd like. I cut mine into about 2X3 inch rectangles. I think it would also be fun to make them into little 1 inch squares for smaller fingers.
Store your Banana Lime Magic Bars in the freezer in an airtight container, and separate the bars with sheets of parchment paper to prevent them from sticking together. For the best flavor, allow them to sit at room temp for a few minutes before serving. Enjoy!

Chickpea & Carrot Curry (gluten free, vegan)
Although I strive to eat a mostly Paleo diet (no grains, legumes, dairy, or refined sugar), I don't always want to eat meat at every meal. In general beans don't completely agree with me digestion-wise (they are legumes), but I still love them, and chickpeas, which are also known as garbanzo beans, are my favorite variety. I grew up eating chickpea curry, and until I discovered how much better I felt eating the Paleo way (almost 3 years ago now), this was in our regular rotation. More commonly known as chana masala on Indian restaurant menus, this is a universally loved dish. I have updated my version of it to be especially kid friendly for my boys by including carrots, because what kid doesn't love carrots? I served our chickpea curry tonight with steamed cauliflower tossed in virgin coconut oil, and even my pickiest eater cleaned his plate.
INGREDIENTS:
3 cups cooked chickpeas or 2 cans organic garbanzo beans
1 medium yellow onion, finely diced
1 1/2 cups diced carrots (about 3 medium)
4 Roma tomatoes, quartered
5 cloves garlic, peeled
2 inch chunk fresh ginger, peeled and roughly chopped
3 tbsp extra virgin olive oil
1 tsp cumin seeds
1 tsp brown mustard seeds
1 tsp ground cumin
1/2 tsp ground coriander
1/2 tsp turmeric powder
1 1/2 tsp sea salt
scant 1/2 tsp freshly ground black pepper
1 cup filtered water
1 tbsp fresh lemon juice
1/4 cup chopped fresh cilantro
DIRECTIONS:
Place the olive oil, cumin seeds, and mustard seeds in a large, heavy pot or Dutch oven with a tight fitting lid. Turn the heat onto medium, letting the oil and whole spices heat up until the mustard seeds start to pop. Once they start popping, immediately add your diced onion and quickly give it all a stir to prevent the seeds from burning. Now reduce the heat to medium low, and brown the onions, stirring frequently to ensure that they don't burn. This can take 10-15 minutes, but be patient! The rich flavor that the browned onions provide this dish is absolutely worth the wait.
While your onions are browning, puree your tomatoes, garlic, and ginger in a blender or food processor. I used my blender, and got almost 2 1/2 cups of puree.
Once your onions have properly browned, add the pureed tomato mix, diced carrots, garbanzo beans, ground cumin, ground coriander, turmeric, salt, and pepper to the pot. Stir well, and allow everything to simmer over medium heat for about 5 minutes, stirring frequently.
Next, stir in the water and reduce the heat to your lowest setting. Cover your pot, and simmer for 30-45 minutes, or until your carrots are tender. Be sure to stir your curry occasionally to prevent the ingredients from sticking to the bottom of the pot.
Once your carrots are properly fork tender, turn off the heat and stir in the lemon juice and chopped cilantro. Do a taste test, and add more salt if you wish.
Enjoy your chickpea curry with rice, steamed cauliflower, quinoa, or roasted sweet potatoes. It's delicious with just about anything!
This was a hearty and satisfying vegan meal for us tonight. What is your favorite vegetarian dinner?
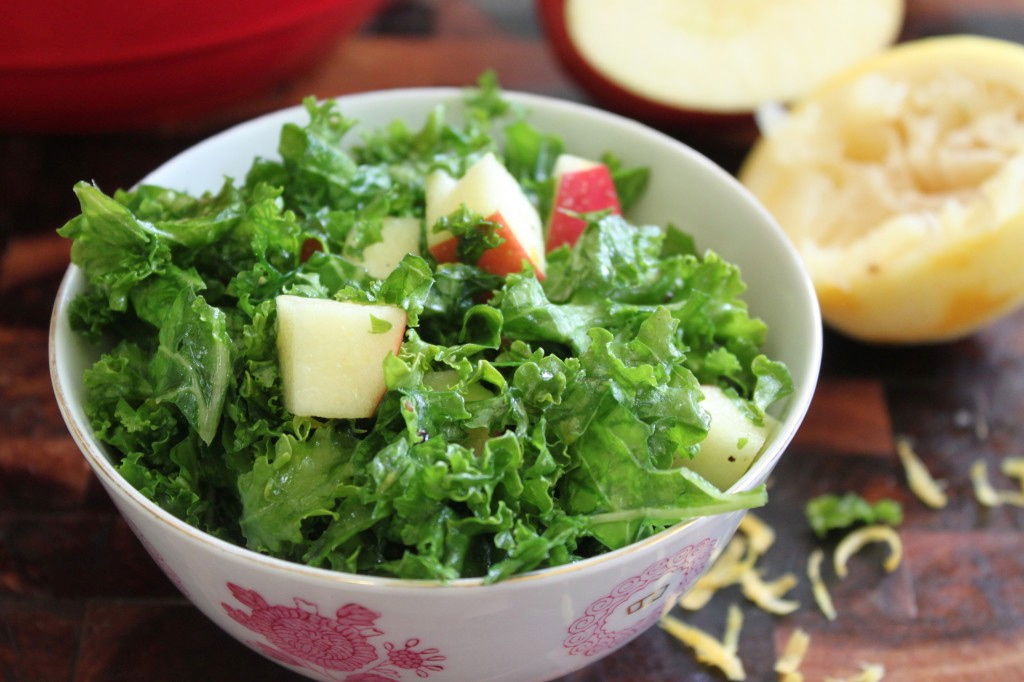
Lemony Kale & Apple Salad (vegan, paleo)
I am on a mission to eat more vegetables everyday. Last year I met a registered dietician who told me that he eats ten servings of fresh fruits and vegetables each day. Ten servings! I'm not saying that I think we all need to consume that much produce every single day, but it did get me thinking about what I'm really eating on a daily basis. While I try to get ample veggies into my diet (I read here that a good rule of thumb is to try to fill half your plate with fruit or vegetables at each meal), I'm not sure if this always happens. It's pretty easy to just reach for a piece of fruit, but my goal is to consume more dark, leafy greens like collards, mustard greens, bok choy, chard, watercress, arugula, and kale. I've found that the more greens I eat each day, the better I feel. I have more energy, I crave less sugar, and my mood seems more mellow overall. I got together with some friends over the weekend, and we ended up having a conversation about how kale is going to save the world (there's actually a t-shirt that makes this claim!). Needless to say, my friends and I are kale fanatics, and rightfully so. For starters, it's delicious sauteed with garlic, cooked into soups, baked into lasagna, blended into smoothies, marinated in salads, roasted with olive oil, salt and pepper, and oven-crisped to make kid-friendly kale chips. And of course we've all heard about the magnificent health benefits of kale (you can read about these benefits here and here). I have many kale recipes to share with you, but I thought that this simple, refreshing, easy-to-prepare salad is a great start. Make a batch, keep it in your fridge, and snack on it throughout the day as a yummy way to get more fresh fruits and veggies into your life.
INGREDIENTS:
1 large bunch of kale (any variety will work, although I prefer green curly kale or Lacinato)
2 1/2 cups diced Fuji apple (about 2 small apples, or 1 1/2 large)
2 tbsp extra virgin olive oil
3 tbsp fresh lemon juice
the zest of one lemon
1/2 tsp salt
Freshly ground black pepper, to taste (I used 15 turns of my pepper mill. Omit for AIP)
Note: Whenever possible, I like to buy organically grown kale and apples to avoid the pesticides used on conventional varieties.
DIRECTIONS:
Wash your kale well to remove residual dirt, sand, and all of the little critters that love kale as much as we do. I do this by rinsing each stalk individually front and back, and then I shake off the excess water. You can also place your kale in a large bowl, fill it with cold water, then agitate the kale with your hands to loosen any debris. Repeat this 3 times. Drain the excess water from your washed kale by giving it a few good shakes in a colander, or you can use a large salad spinner.
Remove the tough stems from your kale, roughly chop the leaves, and place them in a large mixing bowl.
You can easily "zip" the leaves from the stem by holding the stalk upside down, then grasp the end of the stem with one hand and use your other hand to pull the leaves down, separating them from the stem.
This is how much kale I got after removing the stems, and chopping the leaves with a large knife- around 8 cups.
Prepare your dressing by whisking together the olive oil, lemon juice, lemon zest, salt, and pepper, and then pour this mixture over your kale.
Use your hands to give it all a good mix, then massage the kale leaves to help break down the tough fibers. The volume of the kale will shrink considerably after doing this.
Add in the diced apple, mix again, and do a taste check for seasonings.
Make any necessary adjustments, then store your salad in an airtight container in the fridge for up to 3 days (although I doubt it'll last that long!).
As you can probably tell, this is one of my favorite ways to eat kale. What is yours?

Chai Spiced Chocolate Shake (vegan)

My dear friend Rani is a total foodie, and our mutual love of wholesome, delicious fare is something that we frequently bond over. A few months ago she was kind enough to share a recipe for her new favorite breakfast shake (I think she called me specifically to tell me about this shake), and it was perfect timing because I had been feeling uninspired about my morning meals. She described it as thick and yummy, protein-rich, and full of healthy fats. From the ingredient list it sounded so delicious that I made one for myself that same day, and I've been hooked ever since. Packed with heart-healthy omega-3 fatty acids, (provided by the walnuts and chia seeds), it's the perfect solution for those mornings when I'm not in the mood for a meat and veggies breakfast, or when I'm feeling too lazy to prepare a proper meal for myself. It's also a great snack option whether I'm at home or on the go. Over time I have tweaked the original recipe to reflect my own personal taste, but its essence remains the same: A healthy, decadent, deeply satisfying chocolatey shake that you can feel great about sipping. I know I do!
Prep time: 5-10 minutes Yields: about 16 oz
INGREDIENTS:
1/2 cup unsweetened coconut milk 1/2 of a ripe banana 1/4 cup raw walnut pieces 1 tablespoon chia seeds soaked in 2 tablespoons of water 1 or 2 Medjool dates, pitted (omit if you are avoiding sugar) 1 teaspoon pure vanilla extract 2 tablespoons unflavored protein powder (I use pea protein) 2 teaspoons unsweetened cocoa powder 1/2 teaspoon chai masala 5-7 ice cubes

Clockwise from the top: Ice cubes, soaked chia seeds, pitted dates, banana, vanilla extract, protein powder, cocoa powder and chai masala together in the dish, coconut milk, and walnuts in the middle.
DIRECTIONS:
While you are gathering your ingredients, soak the chia seeds in 2 tablespoons of water in a small dish. This causes them to soften and form a thick gel, which makes them easier to blend, and prevents the seeds from flying up the sides of your blender. Place all of your ingredients into a blender, make sure the cover is on tight, and process on high until smooth. This should take just a couple of minutes, and less if you are using a Vitamix.

All of your shake ingredients in the blender. Don't forget to add the ice cubes too!


Your thick and creamy shake after a couple of minutes of blending. The more ice you add the thicker it will be.

Helpful tips: I use unsweetened coconut milk drink from the dairy case at my local grocer, but any milk will do. I've never tried this with full fat canned coconut milk, but I bet it would be delicious. If you want a nut-free shake, you can use 1/4 cup of shelled, raw sunflower seeds in place of the walnuts (Rani's original shake recipe calls for sunflower seeds). Ground cinnamon, cardamom, or nutmeg would be great substitutions for the chai masala, but I would use 1/4 teaspoon of cinnamon and only 1/8 teaspoon of cardamom or nutmeg instead of the 1/2 teaspoon of chai masala to avoid overpowering the other flavors in the shake. Finally, 2 teaspoons of honey would work well as a sweetener if you don't care for dates, although they are yummy in this!