
Strawberry Lime “Jello” (AIP, paleo)

Ruby red and perfectly tangy, these fruit-filled jewels are a healthy upgrade from the sugar-filled, artificially flavored and colored jello that we all grew up with. I have been playing around lately with different fruits and flavor profiles, but I have to say that this combination of strawberries and fresh lime is my favorite, and it's just heavenly. If the thought of jello makes you want to run the other way, I dare you to try these! The texture is kind of like sorbet in a square, and the mix of strawberries and lime reminds me so much of the fruity daquiris that my parents used to make in the summertime when I was little, minus the rum of course (my dad would always make a non-alcoholic batch for us kids).
In addition to the strawberries, lime, and a touch of honey, my fruit snacks are made with wholesome grass fed gelatin. Gelatin is a superfood that is loved for its anti-inflammatory, immune boosting, gut healing, joint rebuilding, and beautifying properties. It's also incredibly protein-rich, in that each tablespoon delivers 6 grams of protein, so it really is a staple for those of us who don't eat nuts, legumes, or dairy, but want a protein-rich source other than meat or fish. I try to consume a little bit of gelatin a few times per week, whether its in the form of homemade jello, via bone broth, or through a couple of tablespoons of collagen in my smoothie (collagen is the precursor to gelatin, and unlike gelatin, it dissolves in cold water). Gelatin is also said to be a sleep aid, so I find these squares to be a perfect bedtime snack, and I have personally found that it does help deliver sound sleep! You can read more about the health benefits of gelatin here.
Health benefits aside, my taste testers all agree that this Strawberry Lime “Jello” is just plain yummy. We never tire of eating it in my house, and it’s even become our favorite snack to take to the beach- I just nestle the squares into a plastic storage container, and then sandwich the container between two ice packs in the cooler or insulated bag. The cubes hold up really well until we are ready to feast.
INGREDIENTS:
4 heaping cups frozen organic strawberries, thawed *
1/3-1/2 cup freshly squeezed lime juice (use more or less depending on your taste)
1/4 cup grass fed gelatin (I use the Great Lakes brand, the red can)
2 tbsp honey
*feel free to use fresh strawberries if you wish, just be sure to hull them before putting them in the blender
DIRECTIONS
1. Place the strawberries in a large, shallow baking dish, and allow them to defrost either at room temperature, or by placing them in a warm oven until defrosted. Once the berries are soft, puree them in a high speed blender or food processor, along with the lime juice. You should end up with about 3 cups of puree.
2. Pour the pureed fruit back into the shallow baking dish, then sprinkle the gelatin over the top, to allow it to "bloom" for about 10 minutes. This important step softens the gelatin, preventing it from sticking together in hard clumps when it is heated. Once the 10 minutes have passed, stir the pureed fruit and gelatin well to combine.
3. Pour your mixture into a medium saucepan, and heat the mixture over low heat, stirring constantly until the gelatin has completely melted and everything is smooth. You should not have any white, gelatinous clumps.
4. Remove the fruit and gelatin mixture from the heat, and stir in the honey until everything is well incorporated. Do a taste test to see if you would like to add more lime juice or more honey. Remember that the outcome will taste less sweet once it is cold.
5. Pour the mixture into an 8x8 ceramic or Pyrex baking dish, then place the dish in the refrigerator for at least 2 hours, until it has set completely.
6. Cut your jello into squares, and enjoy! I like to store my cut jello in a plastic or Pyrex storage container in the fridge, where it will stay fresh for a week, although ours never lasts that long.

Easy Salmon Salad (paleo, AIP)

Happy Aloha Friday, everyone!
Most weekdays, Felix and I have our little routine of going out in the morning for a playdate or a trip to our neighborhood park, and I usually sprinkle some errands in there too. Today, I had a follow up appointment with my opthamologist to check in about some ongoing eye irritation I've been dealing with. Unfortunately, it hasn't resolved yet, but we're working on it. We headed to the park afterwards for some hide and seek, playground time, and bubble blowing, and when we got home I fed Felix a quick lunch of marinated chickpeas, green peas, and green beans- all leftovers from yesterday's dinner. While I got him down for his nap I thought about what I was going to eat for lunch, and decided on one of my old standby's: Salmon Salad. I've been making this probably once a week lately, and today's batch turned out so delicious that I just had to share.
It's a simple, but tasty recipe that you can easily make your own by using whatever you have in the fridge. If you don't like salmon, try using tuna fish instead, or even shredded cooked chicken. Fresh parsley, arugula, or even spinach make a great substitute for the cilantro, and if you have capers or green olives in your fridge or pantry, chop some up and add them to the mix. Kalamatas would be yummy in this salad too. I ate my salmon on a bed of raw kale because I had some already washed and ready to go in the fridge, but you can pile it on top of any greens that you'd like. It would also be great over a heap of diced cucumber or shredded carrots and beets. For a satisfying crunch, I included a side of plantain chips, and polished it all off with a few squares of my homemade strawberry lime fruit snacks. Healthy and satisfying!
INGREDIENTS:
1 6 oz can of wild Alaskan salmon, juices intact (I use the one from Costco)
1/3 cup chopped fresh cilantro
scant 1/4 cup chopped scallions
juice of 1 lemon, reserving 1 tbsp for the kale
2 tbsp extra virgin olive oil, plus 1 tbsp for the kale
1/2 tsp ground turmeric
1/4 tsp Himalayan pink salt or sea salt, more or less to taste
1 tsp apple cider vinegar
2-3 cups raw kale, washed, dried, and cut into bite size pieces
optional: 1-2 tbsp chopped capers or 3 tbsp chopped olives
DIRECTIONS:
1. In a medium sized storage container, mix the can of wild salmon (including the juices), cilantro, scallions, lemon juice, olive oil, turmeric, salt, and capers or olives if you are including them. Set aside.
2. Place the kale in a salad bowl (I use a larger plate-bowl), drizzle the reserved 1 tbsp of lemon juice and 1 tbsp olive oil on top, and then gently massage the kale to break down the tough fibers and distribute the dressing evenly.
3. Put a hefty scoop of the salmon salad on top of your kale (I use about half of the prepared salmon mix), then drizzle everything with 1 teaspoon of apple cider vinegar.
4. Enjoy your Easy Salmon Salad as is, or with a side of your favorite crunchy chips!
These are my favorite chips. If you live in Honolulu, you can find them at Kokua Market. I've also seen them on Amazon, and Inka Chips are another brand that I like, but they aren't as light and airy as the Turbana brand:

And here's a pic of Felix from a little trip to the beach this past Monday morning. He loves to get wrapped up in a towel and eat snacks. I think that day we snacked on frozen blueberries and homemade strawberry lime fruit snacks:

That's all for now. Have a really wonderful weekend!
Aloha,
Fauzia

Blackstrap Molasses Spiced Cookies (paleo, nut-free, egg-free, AIP)

I've been suffering from major cookie cravings lately, and I finally did something about it after a fun morning at the Bishop Museum last week. I wanted to create something that is healthy, relatively low sugar, and AIP (autoimmune protocol) compliant, while still satisfying my inner cookie monster. This was the first batch that I tried, and I'm happy to report that the recipe turned out perfectly. I love it when that happens! Dense and chewy with the right balance of sweetness and spice, these molasses cookies are exactly what I was hoping for. They get their dark color from mineral-rich blackstrap molasses, a rich source of iron, potassium, and calcium, and it has less sugar cup for cup than other sweeteners like cane sugar, coconut sugar, honey, and maple syrup. To achieve a chewy texture, I added grass fed gelatin to the mix. Besides helping the cookies hold their shape, gelatin has a multitude of health promoting qualities that you can read about here, and I love it for its ability to heal the gut, boost immunity, and nourish hair, skin, and nails. If you like ginger cookies, I hope you'll try these out. They are warming, comforting, and thanks to their dense texture, they go perfectly with a glass of your favorite milk!
Makes about one dozen cookies
INGREDIENTS:
1/3 cup plus 2 tbsp coconut flour
1/4 cup tapioca flour (aka tapioca starch)
1 1/2 tbsp gelatin (I use Great Lakes brand, the red can)
2 tsp ground ginger
1 tsp ground cinnamon
1/2 tsp baking soda
1/8 tsp fine sea salt
1/4 cup virgin coconut oil, melted and cooled
1/4 cup blackstrap molasses
1 tsp pure vanilla extract (alcohol-free for those following AIP)


DIRECTIONS:
Preheat your oven to 350 degrees, and line a baking sheet with parchment paper. In a medium sized mixing bowl, whisk together all of the dry ingredients, making sure there are no lumps. Make a well in the center of the bowl, then add the coconut oil and the blackstrap molasses. For easiest measuring of the molasses, first measure out the coconut oil, then use the same measuring cup to measure the molasses. The molasses will slide right out of the cup instead of sticking to the sides. Mix everything together well- the dough will thicken as you continue to mix for 30-60 seconds. Use a tablespoon measure to scoop the dough, and drop it onto the lined baking sheet, leaving about 2 inches between each cookie. Use your fingers to gently flatten the cookies, then bake for 8-9 minutes until the edges are slightly brown and crisp (it'll be hard to see because the dough itself is so dark, but if you trust your nose, you'll be able to smell that the cookies are done).
Before baking:

After baking:

Allow your cookies to cool on the pan before snacking. They store well in an airtight container at room temperature, if you have any leftover. I made a batch yesterday afternoon, and my boys just enjoyed a few as an after school snack with mugs of rice milk for dunking.
I hope you like them too!
~ Fauzia
My monkies eating cookies before bed last weekend:


SALTED DARK CHOCOLATE RASPBERRY CUPS (vegan)

Love is in the air, my friends. And with Valentine's Day just a couple of days away, I couldn't help but to feel inspired to come up with a new chocolatey treat to share with my loved ones (including you!). I dreamt up this simple, yet indulgent recipe as I was falling asleep last night... Salted Dark Chocolate Raspberry Cups. Irresistibly cute, divinely delicious, and so easy to make that you'll feel like a culinary super star when you're done, and your recipients will love you forever. Mission accomplished!
You don't need any fancy equipment or hard-to-find ingredients to make these tasty, three-ingredient chocolates. In fact, everything you need can be found at your neighborhood grocery store. If you don't have a mini muffin pan, don't fret- you can just place the paper cups on a baking sheet or tray, and since you'll be doubling them, they will hold up just fine.
Makes 16 chocolate cups
INGREDIENTS:
8 oz high quality bittersweet dairy-free dark chocolate (at least 60% cacao)
Scant 1/4 cup of raspberry preserves, room temperature
Himalayan pink salt, fleur de sel, or Celtic sea salt (I used a Himalayan pink salt grinder from Costco that I ground on a medium setting)
32 mini muffin cups
DIRECTIONS:
Line a mini muffin pan with your muffin cups, placing two cups in each so that they are doubled up. Locate a teaspoon measure and a quarter teaspoon measure- you'll need them to measure out your chocolate and raspberry preserves.
Note: The larger measuring spoon pictured below is actually a tablespoon measure, which is why it looks so much bigger than the teaspoon measure that you have in your kitchen. I just want to clarify that you are, in fact, using a TEASPOON measure for the chocolate and NOT a big old tablespoon!

Roughly chop the chocolate into smallish chunks, to make for quicker melting. Place 2/3 of the chocolate in a microwave proof bowl and set the remaining 1/3 aside.

Microwave the chocolate in 30 second spurts until it has just melted. This should take only about a minute to 90 seconds total. You don't want the chocolate to get too hot. Add in the remaining chopped chocolate and stir until all of the chunks are melted and the chocolate is smooth. If you need to zap it for another 15 seconds in the microwave, that's fine.

Using your teaspoon measure, scoop up one rounded teaspoon of the melted chocolate and pour it into the first muffin cup, using your finger to empty the spoon. Repeat this step for all of the remaining cups, then gently jostle the pan to even out the chocolate and place the filled cups in the fridge for about 20 minutes, until the chocolate has set.

Remove the filled cups from the fridge and spoon a quarter teaspoon of raspberry preserves onto the middle of each chocolate filled cup.

Use the teaspoon measure to spoon another rounded teaspoon of melted chocolate on top of the raspberry preserves. Gently jostle the pan again to even out the chocolate.

Sprinkle the top of each chocolate cup with a generous pinch of salt. Use more or less depending on your taste. I've found that a more generous sprinkling of salt really helps to balance the sweetness of the chocolate, and to bring out the flavors of the chocolate and raspberry.

Place the filled cups back into the fridge to properly set up for about 3 hours or so. Once they are set you can remove them from the muffin pan and store them in an airtight container in the fridge until you're ready to enjoy them yourself, or share them with others. I prefer these straight from the fridge for the best flavor and texture. They will get melty and smooshy if left out at room temperature for too long, especially if you live in a warm climate.

Happy Valentine's Day, friends! I love you and love you.
XO
Fauzia

Sneaky Veggie & Beef Soup (paleo)

We all know that some kids are better at eating their vegetables than others. Well, If you happen to have a picky eater in your house, then this recipe is for you. Why do I call it Sneaky Veggie and Beef Soup? Because I sneak 3 stalks of celery, one whole red bell pepper, and 3 packed cups of hearty kale leaves in this dish, but all of the vegetables are blended into a purée before cooking, so nobody would ever know! With the fresh, familiar flavors of tangy lime, smokey cumin, and sweet red bell pepper, this sneaky soup sure pleased all three of my guys at dinner last night, and Nikhil (my fussy one) had no clue that he was eating green vegetables.
To make a meal out of it, I served our soup over jasmine rice that I spiced with a quarter teaspoon each of turmeric and cinnamon, and my two year old gobbled up his first serving and quickly went in for seconds. If you can tolerate dairy (lucky you!), I'd bet that a dollop of sour cream would be a divine accompaniment. And if you are eating Paleo or grain free as I am these days, you could enjoy this delicious soup alone, with slices of ripe avocado, or with some roasted squash or sweet potatoes. No matter how you decide to enjoy your Sneaky Soup, I hope you and your family loves it as much as mine!
INGREDIENTS:
2 tbsp extra virgin olive oil
1 pound grass fed ground beef*
1/4 cup dried onion or 1/2 cup fresh yellow or white onion, finely diced (I used dried onion because that's all that I had in the house. Be sure it's dried onion flakes, and not onion powder.)
1 large red bell pepper, seeds removed, roughly chopped
3 large stalks celery, roughly chopped
3 packed cups kale leaves
4 cloves garlic, peeled
2 cups chicken broth**
1.5 tbsp ground cumin
1/2-1 tsp sea salt (depends on your preference and how salty your broth is)
1 tbsp fresh lime juice
1/4 cup chopped cilantro leaves
* If you don't care for beef, ground turkey would be a great substitute.
**If you use reduced sodium broth, you'll most likely need to add extra salt at the end to achieve the right flavor.
DIRECTIONS:
Pour 2 tablespoons of extra virgin olive oil into a large soup pot and heat over a medium setting. Add in the dried onion or fresh onion plus your ground beef, and begin to break the beef apart with a wooden spoon. Continue cooking the beef over medium-low heat, crumbling the meat as much as possible, and stirring everything to allow the onions to cook through until at least translucent, if you used fresh onions. If you used dried onions, they will do their thing and turn a little golden brown.
While the beef and onions are cooking, prepare your vegetables: Place the red bell pepper, celery, garlic, and chicken broth in your blender cup, and process until everything is blended into a smooth puree. Add in the kale leaves, and blend again until the kale is pureed (you could try adding all of the veggies on the first try, but kale is pretty bulky so it might not all fit). You'll have a somewhat frothy, watery, strange looking liquid, but don't worry- this will all cook down and turn into a beautiful soup.
Once the beef and onion have cooked through, add the pureed veggies and broth mixture, ground cumin and 1/2 teaspoon of sea salt to the pot. Give everything a good stir, and then bring it to a boil. Once you've reached a boil, reduce the heat to a simmer, and let it cook uncovered for about 20-30 minutes until the liquid has reduced and you're left with a rich, somewhat thick soup. The consistency of the soup will be almost as thick as chili, but definitely "soupier."
Once you've reached a consistency that you're happy with, turn off the heat and stir in the remaining 1/2 teaspoon of salt and fresh lime juice. Ladle into bowls and garnish with fresh cilantro leaves. Enjoy!


Tangy Coconut Date Dip (vegan, paleo, AIP)

Today we threw a good old fashioned birthday party for Nikhil and Felix, who are both January born. The party was in the afternoon between lunch and dinner, so I put together an array of healthy and yummy snacks that all happened to be vegan, and gluten-free of course. This Coconut Date Dip is a little treat that I whipped up on Friday afternoon with ingredients I already had in my fridge and pantry. I served it with Granny Smith apple slices and it was a big hit at the party, especially amongst the parents. Sweet and tangy with complex notes of warm ginger and cinnamon, it boasts a great texture that would also work well as a spread for toast or crackers, paired with strawberries or pear, or just straight from the spoon for an energizing, fiber-filled bite. I'm not sure if my boys had a chance to try out this snack today (they were too busy having a blast with all of their pals), but I'm guessing they'd love it. I think I'll offer it up with crackers tomorrow after school. We'll see what they say!
INGREDIENTS:
1 cup dried unsweetened coconut
10 Medjool dates, pitted
3 tbsp fresh squeezed lemon juice or calamansi or sour orange juice
1 tsp ground ginger
1/2 tsp ground cinnamon
1/2 cup water
Pinch of fine sea salt
Place all ingredients in a food processor fitted with an "S" blade, and blend until a thick paste has formed. If your Medjool dates are a bit dry or tough, you can soften them up by soaking them in a bowl of hot water for 5 minutes before adding to the food processor. Store in an airtight container in the fridge for up to 5 days. For best taste and texture, let your dip come to room temperature before serving.
Enjoy!


The Easiest Pulled Pork Ever (paleo, slow cooker)

Happy New Year, friends! I hope you all had a fun and relaxing end to 2014. We enjoyed a fabulous staycation here with my sister who came to visit us from Seattle, and we've been slowly getting back into the swing of normal life. This last week I spent a good chunk of time making some changes to my website that I hope will make for easier navigation, and a more streamlined experience. It's still a work in progress, so if you have any requests or comments, I would love to hear from you. As always, I have been experimenting with creating recipes in the kitchen, and here is one of my new favorites: The Easiest Pulled Pork Ever.
This has got to be one of the easiest and most delicious meat dishes that I've ever made. It takes just 5 minutes of prep time, and then it cooks all night while you are sleeping. I started this slow cooker pulled pork for the first time one evening last week, and the house smelled amazing when I woke up the next morning. The meat was so tender and juicy that it completely fell apart when I barely nudged it with my fork. Yum! Felix and I were so into it that we shared a big bowl of pulled pork for breakfast alongside some steamed broccoli and roasted sweet potatoes. Unconventional, I know, but it was delicious! This succulent meat would also be the perfect filling for tacos or burritos, or served alongside some rice and sauteed greens. I bet it would also be great under some melted cheese on a yummy sandwich with pickled veggies, or for a lighter meal, on top of a mixed salad with chopped apples and a gingery apple cider vinaigrette. Whichever way you decide to enjoy your slow cooker pulled pork, I hope you make some soon, and please let me know how it turns out!
INGREDIENTS:
One 2 1/2 -3 pound boneless pork shoulder
1 cup sliced yellow or white onion
5 cloves fresh garlic, roughly chopped
2 inch chunk of fresh ginger, sliced
1 cinnamon stick
2 whole cloves
4 whole cardamom pods (omit for Autoimmune Protocol)
1/4 cup water
1-2 tsp red Hawaiian salt, pink Himalayan salt, or any sea salt. The amount will depend on the size of your pork shoulder as well as your preference. I used 2 tsp coarse red Hawaiian salt for a 3 pound piece of meat and it was perfect.
15 turns of the pepper mill (omit for AIP)
1 tbsp apple cider vinegar
Variation: If you are able to tolerate tomatoes, a tasty alternative to this simple recipe is to add a tablespoon of tomato paste and 2 teaspoons of ground cumin. Mix well, and turn the pork shoulder a few times to coat before cooking.
DIRECTIONS:
Place the onions, garlic, ginger, cinnamon, cloves, cardamom, apple cider vinegar, and water in the bottom of your slow cooker pot and give it all a stir. Lay the pork shoulder on top of the onion and spices, then sprinkle with the sea salt and freshly ground pepper and turn the pork shoulder a few times to coat. Cover, and let it cook on low for 8-10 hours. Use a fork to gently pull the meat apart, and remove the whole spices before serving.


Wilted Kale with Orange & Ginger (paleo)

A dear friend of mine invited us over to her place yesterday for a lovely day-after-Thanksgiving get together. Nikhil and Felix are good buddies with her two girls, so it turned out to be a fun playdate for the kids, and a relaxing afternoon for us adults. I had bought kale at the farmers market on Tuesday knowing that I wanted to make a hearty green salad for Friday's meal, but I was undecided about the specifics. This warm, citrusy salad is what I threw together at the last minute as my offering to the table, and I thought that it turned out pretty tasty! Oranges are back in season again, and they come together nicely with fresh ginger, golden onions, and a sprinkling of crispy bacon to create a fragrant kale dish that is both a little sweet and a little savory.
INGREDIENTS:
1 large bunch of kale
2 tbsp virgin coconut oil
1/3 cup thinly sliced yellow or white onion (shallots would work well too)
1/4 cup fresh squeezed orange juice (you can also use mandarins or clementines)
1 tsp orange zest
2 1/2 tsp crushed ginger
1/4 cup chopped crispy bacon
sea salt to taste

DIRECTIONS:
Start off by cooking your bacon. I already had some chopped bacon leftover from our Thanksgiving meal on Thursday, so I just threw that into my mix. If you are starting from scratch, you'll need about 3 strips of bacon. After the bacon is cooked, cooled, and chopped, prepare your kale by first washing it, then remove the tough stems from each stalk and roughly chop the leaves. Heat 1 tablespoon of coconut oil in a large skillet over medium heat, and add the onions to the pan. Add a pinch of of salt to the onions, then saute until they are lightly browned.

Place the kale in the skillet, and drizzle another tablespoon of coconut oil and about 1/4 teaspoon of salt over the top.

It'll seem cumbersome in the skillet at first, but as the kale starts to wilt down, it'll get easier to stir. Add in the fresh orange juice, orange zest, crushed ginger, and chopped bacon and give it a good stir. Once everything is incorporated and the kale is just wilted, remove it from the heat and do a taste test. You can add more salt and even more orange juice or ginger to your liking.

I hope you enjoy this warming, wintery dish!

Slow Cooker Chicken Curry (paleo)

It's almost Thanksgiving!
I love this time of year. The weather in my neighborhood cools down to a perfect 78 degrees, and everyone starts to get super festive with get togethers, holiday activities, and lots of yummy food. I had my girlfriends over on Saturday evening for a potluck and jewelry party (you can check out my friend Chun's dainty pieces here), and my contribution to the dinner table was this Slow Cooker Chicken Curry that turned out to be a hit. I make this dish probably 2-3 times a month, and I almost always put it on the menu if we are entertaining guests. Aside from being a crowd pleaser (it's even kid-approved), it's an easy, fool-proof recipe that requires little prep time, and then the slow cooker does the majority of the work for you.
I used to make my curry with a can of organic diced tomatoes and a couple of tablespoons of tomato paste, but last week I started on a modified version of the Autoimmune Protocol Diet, which sadly does not include tomatoes or any of the nightshade vegetables. It may sound like an extreme way of eating, especially since I don't actually have autoimmune disease, but this anti-inflammatory diet has already improved my digestion and lessened my fatigue symptoms in just 6 days, so it's 100% worth it to me to stick with this eating plan for now.
To make my Slow Cooker Chicken Curry nightshade free, I used puréed pumpkin in place of the tomato, and it turned out wonderfully! I thought that the pumpkin would be a perfect substitute for the tomato because of it's slightly tart flavor, and because it goes so well with spices such as cinnamon, clove, and cardamom. You can't taste the pumpkin in the curry, but it gives the dish a beautiful color, a boost of fiber and nutrients such as beta carotene, and it blends with the coconut milk and spices to create a deeply flavorful sauce. If anyone in your family is finicky about eating their vegetables, this is a fantastic way to sneak some veggies into their diets. I'm sharing a batch of this at Nikhil's Thanksgiving celebration tomorrow at school, and I am curious to see how the parents and kids like it!
Whether you are looking for a seasonal alternative to the traditional Thanksgiving dinner, or wanting to add a hearty slow cooker meal into your weekly rotation, I hope you try this out and enjoy it as much as we do!
Prep time: about 25 minutes Cook time: 5-6 hours Servings: 10-12 (you'll have leftovers for sure)
INGREDIENTS:
4-5 pounds boneless skinless chicken thighs
1 cup pure pumpkin purée (canned or homemade)
1 14 oz can full fat coconut milk
1 medium yellow onion, peeled and cut into large chunks
5 cloves garlic, peeled
2 inch chunk of fresh ginger, peeled and cut into chunks
1 cinnamon stick
1 tbsp ground cumin
1 tbsp ground coriander
1.5 tsp ground turmeric
6 whole cardamom pods
6 whole cloves
1 bay leaf
1 1/2 tsp sea salt
15 turns of the pepper mill
1/4 cup fresh lemon juice (or more to taste)
1/4 cup chopped cilantro
Note: If you would like to try my original recipe that calls for tomato, simply replace the pumpkin purée with one 14 oz can of diced tomatoes, plus 2 tablespoons of tomato paste, and omit the cinnamon stick. Add the diced tomatoes to the blender with the coconut milk, ginger, garlic, and onion, and purée until smooth, then add this sauce to the chicken and dry spices. The rest of the recipe remains the same. If you'd like to make the pumpkin recipe, but can tolerate tomatoes, I highly recommend adding a tablespoon or two of tomato paste to your curry. It gives the dish a beautiful depth and really brings everything together. If you are sticking to the pumpkin recipe, be sure to add lots of lemon juice to taste, as it will brighten the curry and tie the flavors together.
DIRECTIONS:
Rinse your chicken under cold water, and shake off as much water as possible. Trim any excess fat from the chicken thighs, and cut the meat into large chunks. Place the chicken in the pot of your slow cooker, and get started on the sauce. Place the coconut milk, onion, garlic, and ginger into a high speed blender or food processor, and blend on high until smooth. Pour this mixture over the chicken, then add the pumpkin, and all of the spices- cinnamon, cumin, coriander, turmeric, cardamom, cloves, bay leaves, salt, and pepper- and give it a good stir. Cover the pot, and turn your slow cooker to the low setting. Let it do its job for 4 or 5 hours, then turn the setting to high, and crack the lid so that the steam can escape and the sauce can reduce, stirring occasionally. I usually do this in the last hour or 2. Alternatively, you can leave it on low for 8 hours overnight, or while you're gone during the day, and you most likely won't need to let the sauce reduce. When you are ready to serve, stir in the lemon and cilantro, and do a taste test. Add more salt and/or lemon if necessary, to taste. Serve with rice, quinoa, or chapati. I like to eat mine drizzled with virgin coconut oil and a squeeze of lemon, with a side of roasted sweet potatoes and a dollop of green chutney. For a little kick, I suggest adding some Sriracha or your favorite hot sauce.
I hope you all have a wonderful Thanksgiving holiday filled with love, gratitude, and good food. I am certainly grateful for all of you.
With Aloha,
Fauzia

Cinnamon Raisin Cookies (vegan, paleo, nut-free)

Happy Monday, everyone!
Hurricane Ana brought us a weekend full of non-stop rain, and the cool, grey weather put me in a baking kind of mood. Yesterday afternoon I made a batch of these divinely aromatic cookies, and I thought this would be the perfect time to share my newest recipe with you all.
Crisp on the outside, and chewy on the inside, my Cinnamon Raisin Cookies are so good for so many reasons. For the past month I have been working on a cookie that is Paleo, vegan, and nut-free, and I was pleased when this recipe turned out perfectly.
Free of eggs, dairy, grain, tree nuts, refined sugar, and gluten, these yummy bites are exactly what I was hoping for. When I did food allergy testing about 6 years ago, it was eggs and almonds that came up as my two biggest offenders, and I have many friends and family members who also avoid nuts, so I wanted to come up with a baked treat that we can all enjoy without triggering a negative immune response or digestive upset.
Instead of relying on almond flour, which is the most commonly used flour in Paleo baking aside from coconut flour (which requires the use of eggs), my Cinnamon Raisin Cookies feature a base of ground raw sunflower seeds and dried unsweetened coconut. Low in sugar, but rich in fiber, protein, and healthy fats, I feel great about giving these to my boys at any time of the day, and I rely on them for an energy-packed snack for myself. They are also the perfect companion to a cup of tea at the end of the day.
If you aren't crazy about raisins, feel free to use any type of dried fruit instead (I avoid ones with added sugar), or turn these into chocolate chip cookies by using a half cup of chopped dark chocolate chips in place of the raisins. Don't be intimidated by the use of ground raw sunflower seeds- you can easily grind them yourself at home using your food processor or a clean spice grinder.

Yields about 2 dozen cookies
DRY INGREDIENTS:
1 1/2 cups finely ground raw sunflower seeds (make sure they are not roasted or salted)
1/2 cup dried unsweetened shredded coconut
3/4 tsp ground cinnamon
1/2 tsp baking soda
1/4 tsp fine sea salt
WET INGREDIENTS:
2 tbsp pure maple syrup
1/4 cup plus 1 tbsp unrefined virgin coconut oil, melted and cooled
3 tsp pure vanilla extract
1/2 cup raisins, roughly chopped
DIRECTIONS:
Preheat your oven to 350 degrees, and line a baking sheet with parchment paper.
First, grind your raw sunflower seeds in a clean, dry spice grinder or food processor. I have used both methods and found that the food processor is much easier. You can do a larger quantity at once, and the flour doesn't clump together, as it tends to do in the spice grinder. Fit your food processor with an "S" blade, and let it run for about 3 or 4 minutes until the seeds are finely ground. It's okay if the sunflower seed flour looks a bit grainy or mealy. It doesn't need to be superfine for this recipe.
Whisk all of the dry ingredients together in a medium sized mixing bowl, making sure there are no clumps. Make a well in the center of the bowl, and add the maple syrup, coconut oil, and vanilla. Stir well until everything is well combined, then add in your chopped raisins and mix well again. The dough should be quite sticky.

Scoop your dough by a packed tablespoon measure onto the lined baking sheet, using your finger to scoop the dough out of the measuring spoon. Make sure that you really pack the tablespoon so that the balls of dough that you turn out onto the baking sheet aren't full of air pockets. You don't want to have crumbly cookies in the end!

These cookies don't spread much when they bake, so you can fit 15 on a standard sized sheet.

Gently flatten the cookies with your fingers, leaving an inch between each pressed cookie.

Bake for 6-8 minutes until they are slightly golden brown, and crispy along the edges, being careful to avoid overdone cookies. Remove them from the oven and let the cookies cool for at least 5 minutes on the baking sheet before transferring them to a cooking rack. Allow your cookies to cool completely before storing them in an airtight container.

Note: Because it's so humid here I always store my baked goods in the fridge to maintain their freshness, and I love these cookies right out of the fridge. I've found that they stay crisp on the outside for a couple of hours after coming out of the oven, but they tend to lose that crunch after a while. I'm assuming it's because of the high humidity here, but I'm curious to know how yours fare in other climates!
Are your cookies green?!
Don't be alarmed if your cookies take on a slightly green hue and/or turn bright green in the middle. There's nothing wrong with your cookies- it's just due to a chemical reaction between the chlorophyll in the sunflower seeds and the baking soda. I've also found that my cookie dough turns green if I don't bake it right away (I'll sometimes make the dough ahead of time and refrigerate it to bake later). My boys love finding green inside their cookies.

I love getting your feedback! Do you have a favorite healthy go-to snack? I'm always looking for new snack ideas for myself and my boys.

Creamy Leek, Mushroom & Chicken Soup (paleo)

Yesterday afternoon I decided to make some homemade gluten free pizza crust so that the boys could have pizza night, which is Nikhil's favorite. While I was waiting for the dough to rise, I searched through the fridge to figure out what I was going to make for myself for dinner, because as much as I love pizza, the bread & cheese combo just doesn't agree with me. My internal clock must sense that it's officially fall now, as somehow I was craving soup again, even though it continues to be close to 90 degrees here! In the fridge I found a whole leek and a bunch of fresh dill leftover from the delicious Summertime Salmon Chowder that I made last week, as well as the remnants of a rotisserie chicken that I had picked up over the weekend. I also found a handful of crimini mushrooms in the fridge, which I thought would work well with the leeks and the dill. My findings were especially fortuitous because I love mushrooms and any type of onion, but Ben barely tolerates them (I think he's mildly allergic to onions), so I wouldn't normally make something like this for the family. I knew Ben would enjoy pizza night with the boys, so I got to work on my own dinner, and came up with this oh so yummy soup.
INGREDIENTS:
3 tbsp extra virgin olive oil
1 medium leek, halved lengthwise then thinly sliced (2 cups)*
2 stalks celery, halved lengthwise then sliced into 1/4 inch thick pieces
5 crimini mushrooms, thinly sliced
1 can full fat coconut milk
2 cups chicken stock**
1 1/2 tsp paprika
10 turns of the pepper mill
2 Tbsp chopped fresh dill
1 1/2 cups cooked chicken, roughly chopped (I used a rotisserie chicken)
1/2 tsp sea salt, or less to taste
*A tip about cooking with leeks: I was taught to use the white and light green portion of the leek, and not the darker green, tougher part. Leeks grow in sandy soil, so you want to be sure to properly rinse your leeks in a colander after slicing them. You can also soak the sliced leeks in a large bowl of water to let the heavier soil sink to the bottom, and then rinse several times to ensure that all debris has been removed. You don't want gritty soup!
**If you use reduced sodium stock, you may need to add more salt at the end to achieve the right flavor.
DIRECTIONS:
In a large soup pot with a tight fitting lid, heat the olive oil over medium heat. Add the leeks, celery, and mushrooms to the pot and saute your veggies until the leeks are tender, and have just started to brown a little bit, about 8 minutes. Stir in the coconut milk, chicken stock, paprika, black pepper, and dill, and bring to a low boil. Place the chicken in the pot, give everything a good stir, and then cover your pot. Reduce the heat to the lowest setting, and let it simmer for 10 minutes, until the celery is tender. Taste your soup, and if you require more seasoning you can add 1/4-1/2 teaspoon of sea salt. I added 1/2 teaspoon of salt to mine, and it tasted perfect. Ladle the soup into bowls and garnish with some dill fronds if you'd like. I devoured mine on it's own, but I think it would be delicious with some buttered gluten free toast, or a chunk of crusty sourdough bread. I recommend making a double batch of this soup so that you can freeze some to have on a chilly night when you just don't feel like cooking.
Enjoy, friends!

Summertime Salmon Chowder (paleo, aip-friendly)

Despite our humid, 88 degree weather here, I found myself craving salmon chowder of all things the other afternoon. I did an online search for a Paleo version, and thought that the ingredient list of Sarah Fragoso's Scrumptious Salmon Chowder looked appealing. I had most of what I needed at home except for carrots, bacon, and leeks, so the boys and I took a trip to our well air conditioned grocery to get some stuff. It was a great excuse to get out of the house and cool off. Although Sarah's recipe doesn't call for it, I picked up some crisp celery at the store to add to my soup because I wanted that extra savory flavor in there. I also opted to cook the bacon in whole strips, and then poured off the bacon fat and replaced it with virgin coconut oil before sauteing my veggies. I know it's common in Paleo cooking to use a fair amount of bacon fat, but I'm just not a fan. I made a few more changes to the recipe, but mostly stuck to Sarah's ingredient list and I have to say that the result truly was scrumptious! Both of my boys enjoyed the dish, and I ate two large bowls at dinner, plus a bowl for lunch the next day. I shared it with a friend of mine, and her response to her first bite was "yes!" So, even though this is not my original recipe, I wanted to share it with you because it's just that good. And if you feel like checking out the Everyday Paleo website, be sure to look for Sarah's Puerto Rican Beef and Chocolate Custard recipes. They are two of my faves.
Adapted from Everyday Paleo
INGREDIENTS:
12 oz nitrate and nitrite free bacon, cooked until crispy
1 Tbsp virgin coconut oil
1 ½ cups leeks, sliced into thin rounds- about one medium sized leek*
3 large carrots, peeled and cut into 1/4 inch thick half moons
2 stalks celery, chopped
3 cups chicken stock- not reduced sodium**
1 13.5 oz can full fat coconut milk
2 tablespoons fresh dill, chopped
1 lb of wild salmon fillets (skin and bones removed)
10 turns of the pepper mill (omit for AIP)
*A tip about cooking with leeks: I was taught to use the white and light green portion of the leek, and not the darker green, tougher part. Leeks grow in sandy soil, so you want to be sure to properly rinse your leeks in a colander after slicing them. You can also soak the sliced leeks in a large bowl of water to let the heavier soil sink to the bottom, and then rinse several times to ensure that all debris has been removed. You don't want gritty soup!
**If you use reduced sodium stock, you may need to add salt at the end to achieve the right flavor.
DIRECTIONS:
First, cook the bacon in a large skillet until it's crispy, then transfer it to a plate lined with paper towels (to absorb the excess oil), and pour the bacon fat from the skillet into a disposable receptacle. You may need to cook the bacon in two batches. Add the coconut oil to the skillet (or a soup pot if your skillet is too shallow), then add in your leeks, carrots, and celery. Saute the veggies until they are tender- I cooked mine for about 7 minutes over medium heat. While your veggies are cooking, chop the crisped bacon into small bite sized pieces. Now add your coconut milk, chicken stock, bacon, black pepper, and dill to the pot and bring to a low simmer. Add in the whole salmon fillets and gently simmer until the fish starts to flake apart, which should take 5 minutes or so. Once the salmon has cooked through (but not overcooked!), and the carrots are tender, your chowder is ready. Ladle into bowls and garnish with a few sprigs of fresh dill if you'd like.
Enjoy!

Cilantro Lime Chicken (paleo)

I absolutely love the fragrant, tart flavor of limes- especially in the summertime. As you may have noticed in my last post, I have been on a lime kick recently, and I've been using every opportunity possible to incorporate these citrusy gems into my cooking. A few weekends ago, we went on a family hike to a waterfall that is just a few miles from our house. The boys were so tired when we got home that they all took an afternoon nap (Ben included), so I decided to get creative in the kitchen and make a yummy dinner from the stuff that I already had in my fridge. The result was this savory and tangy Cilantro & Lime Chicken, which I served alongside an easy vegetable curry that I made up that afternoon as well (I'll post that recipe soon). It was a hearty and satisfying dinner that is both kid and grown-up friendly. Although the chicken was tasty for dinner that night, it was 100% better the next day for lunch after a couple of leftover breasts had a chance to marinate in the fridge overnight. So, I highly recommend marinating your chicken for at least 8 hours before cooking it, which tenderizes the meat and infuses it with the intense flavors of the lime, cilantro, garlic, and cumin. I promise it'll be worth the wait. One of the best things about this juicy chicken is that it's super versatile. It would be delicious on top of a crunchy romaine salad, inside of a sandwich, with sauteed greens and jasmine rice... feel free to get creative and pair it with some of your family's favorite sides.
INGREDIENTS:
4-5 boneless skinless chicken breasts, excess fat trimmed
MARINADE:
Juice of 2 limes
Zest of 2 limes
5 cloves garlic, minced or crushed
1/4 cup chopped fresh cilantro
2 tsp sea salt
20 turns of the pepper mill
1 tsp ground cumin
DIRECTIONS:
First, mix all of your marinade ingredients together in a small bowl. Place the chicken breasts in a shallow dish, then pour the marinade over the chicken and quickly massage the mixture into the meat to make sure it's evenly coated. Cover the dish and let the chicken marinate in the fridge for 8-24 hours.


When you are ready to cook your chicken, remove it from the fridge and let it come to room temperature before cooking (this is one way to help prevent the meat from drying out during the cooking process). In a large, heavy skillet with a lid, heat 3 tablespoons of virgin coconut oil or extra virgin olive oil over medium heat. Pat the chicken dry with a paper towel to remove any excess moisture, then place your chicken in the hot skillet, ensuring that the chicken is not too crowded (too much meat in the pan will result in the chicken steaming instead of searing). You may need to cook the chicken in a couple of batches.


Cook each side for 3-4 minutes, allowing a nice crust to form on each side. After you've cooked the second side, reduce the heat to low, cover the skillet, and let it cook for another 3-5 minutes. You want your chicken to be cooked through (no longer pink inside), but still tender and moist. Be careful to not overcook your meat, as it will continue to cook a bit even after you remove it from the heat.
Remove the chicken onto a cutting board and allow it to rest for 5-10 minutes. You can cover it with foil to keep it warm, if you wish. This step allows all of the juices to reabsorb back into the meat so that you're left with moist, juicy chicken when you cut into it. After it's had a chance to rest, cut your chicken on an angle and against the grain.


Enjoy!

Banana Lime Magic Bars (raw, vegan, paleo-friendly)

Aloha Everyone!
It has been almost 3 months since I last posted. Yikes! We've had a very busy (and beautiful) spring here in Honolulu, but now that it's almost officially summer, it feels like things are starting to slow down a bit. I created this recipe yesterday evening while my littlest one was taking an unexpected nap, and I am super excited to share it with you. Sweetened only with fruit, these tangy freezer bars are the perfect summertime treat for the whole family, and they are so easy to whip up. Ben and I each enjoyed one for dessert last night (they weren't ready until after the boys had gone to bed), and he loved them so much that he called them "magic." I think you'll feel the same!
PREPARE THE CRUST:
1 cup raw cashew meal (I bought mine at Trader Joe's, but you can easily grind raw cashews in your food processor to make your own)
or use 1 1/4 cup raw pecans or walnuts and grind them in the food processor or blender
7 soft Medjool dates, pits removed
2 tbsp virgin coconut oil, melted and cooled, plus more to grease the pan
1 tsp pure vanilla extract 1/4 tsp fine sea salt
Drizzle a little bit of coconut oil into a dry, 9x5 inch loaf pan. Spread it around with your fingers, then line the pan with a piece of parchment paper, allowing for extra paper on the sides (you will use the excess to pull the frozen mixture out of the pan). The coconut oil on the pan prevents the parchment from slipping around while you're trying to line the pan. Do your best to press the paper into the corners of the pan, making it as smooth as possible. Don't worry if it looks a little awkward.
Place all of your crust ingredients, including the 2 tbsp virgin coconut oil, into a food processor fitted with an "S" blade, and pulse until the ingredients are all well incorporated and you have a sticky, crumbly looking "dough." If you are making your own cashew meal, first grind the cashews, measure out exactly one cup, then add that back into the food processor with the rest of your ingredients.
Turn the dough out into your lined loaf pan, then use your fingers to press the dough into the bottom of the pan, creating your crust. You want to get the crust as evenly thick as possible. Put the pan into the freezer to allow to the crust to firm up, and get started on your filling.
FOR THE FILLING:
3/4 cup mashed ripe banana (I used 2 white apple bananas from my local farmers market, but regular bananas will work just as well).
3-4 tbsp fresh lime juice (you may want to add a bit more if using regular bananas, as apple bananas tend to be more tart)
1 tsp (packed) lime zest
1/2 cup raw coconut butter (I love the Artisana brand)
1 tbsp virgin coconut oil, melted and cooled
tiny pinch of fine sea salt
To prepare the filling, first mash the bananas with a fork until you reach a pureed consistency, then measure out 3/4 cup.
Place all ingredients into a bowl and process with a hand immersion blender until smooth. You can also use your regular blender to achieve the same result.
Remove the crust from the freezer. Pour the filling onto your prepared crust, then use a spatula to gently spread it out so that it's evenly distributed over the crust, taking care to avoid thin or thick spots. When you cut your bars after freezing, you want them to have a uniform thickness.
Put the pan into the freezer and let it all set up for at least 3 hours (it may take longer depending on how cold your freezer is). If you are going to leave it to freeze overnight, I suggest covering the pan tightly with plastic wrap to avoid freezer burn.
These bars are best served straight from the freezer. When you are ready to indulge, remove the pan from the freezer, let thaw for about 20 minutes then pull up on the sides of the parchment paper to remove your slab of goodness onto a cutting board, keeping the parchment paper intact.
Use a large, sharp knife to slice it into uniformly sized bars. You can make them as big or as small as you'd like. I cut mine into about 2X3 inch rectangles. I think it would also be fun to make them into little 1 inch squares for smaller fingers.
Store your Banana Lime Magic Bars in the freezer in an airtight container, and separate the bars with sheets of parchment paper to prevent them from sticking together. For the best flavor, allow them to sit at room temp for a few minutes before serving. Enjoy!


Chickpea & Carrot Curry (gluten free, vegan)

Although I strive to eat a mostly Paleo diet (no grains, legumes, dairy, or refined sugar), I don't always want to eat meat at every meal. In general beans don't completely agree with me digestion-wise (they are legumes), but I still love them, and chickpeas, which are also known as garbanzo beans, are my favorite variety. I grew up eating chickpea curry, and until I discovered how much better I felt eating the Paleo way (almost 3 years ago now), this was in our regular rotation. More commonly known as chana masala on Indian restaurant menus, this is a universally loved dish. I have updated my version of it to be especially kid friendly for my boys by including carrots, because what kid doesn't love carrots? I served our chickpea curry tonight with steamed cauliflower tossed in virgin coconut oil, and even my pickiest eater cleaned his plate.


INGREDIENTS:
3 cups cooked chickpeas or 2 cans organic garbanzo beans
1 medium yellow onion, finely diced
1 1/2 cups diced carrots (about 3 medium)
4 Roma tomatoes, quartered
5 cloves garlic, peeled
2 inch chunk fresh ginger, peeled and roughly chopped
3 tbsp extra virgin olive oil
1 tsp cumin seeds
1 tsp brown mustard seeds
1 tsp ground cumin
1/2 tsp ground coriander
1/2 tsp turmeric powder
1 1/2 tsp sea salt
scant 1/2 tsp freshly ground black pepper
1 cup filtered water
1 tbsp fresh lemon juice
1/4 cup chopped fresh cilantro
DIRECTIONS:
Place the olive oil, cumin seeds, and mustard seeds in a large, heavy pot or Dutch oven with a tight fitting lid. Turn the heat onto medium, letting the oil and whole spices heat up until the mustard seeds start to pop. Once they start popping, immediately add your diced onion and quickly give it all a stir to prevent the seeds from burning. Now reduce the heat to medium low, and brown the onions, stirring frequently to ensure that they don't burn. This can take 10-15 minutes, but be patient! The rich flavor that the browned onions provide this dish is absolutely worth the wait.


While your onions are browning, puree your tomatoes, garlic, and ginger in a blender or food processor. I used my blender, and got almost 2 1/2 cups of puree.


Once your onions have properly browned, add the pureed tomato mix, diced carrots, garbanzo beans, ground cumin, ground coriander, turmeric, salt, and pepper to the pot. Stir well, and allow everything to simmer over medium heat for about 5 minutes, stirring frequently.


Next, stir in the water and reduce the heat to your lowest setting. Cover your pot, and simmer for 30-45 minutes, or until your carrots are tender. Be sure to stir your curry occasionally to prevent the ingredients from sticking to the bottom of the pot.

Once your carrots are properly fork tender, turn off the heat and stir in the lemon juice and chopped cilantro. Do a taste test, and add more salt if you wish.


Enjoy your chickpea curry with rice, steamed cauliflower, quinoa, or roasted sweet potatoes. It's delicious with just about anything!

This was a hearty and satisfying vegan meal for us tonight. What is your favorite vegetarian dinner?
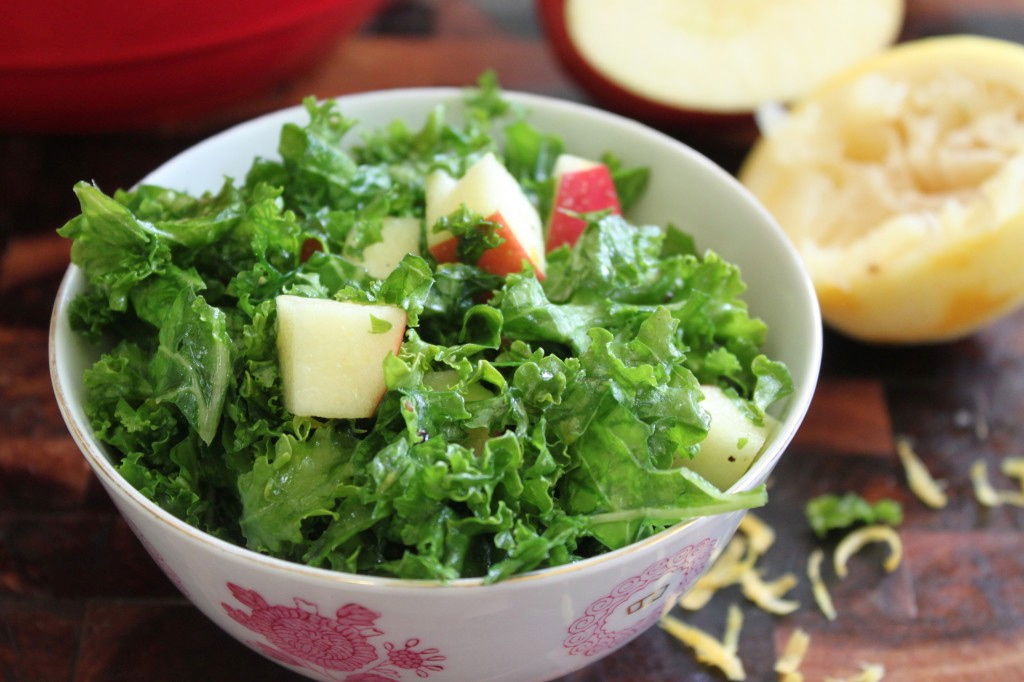
Lemony Kale & Apple Salad (vegan, paleo)
I am on a mission to eat more vegetables everyday. Last year I met a registered dietician who told me that he eats ten servings of fresh fruits and vegetables each day. Ten servings! I'm not saying that I think we all need to consume that much produce every single day, but it did get me thinking about what I'm really eating on a daily basis. While I try to get ample veggies into my diet (I read here that a good rule of thumb is to try to fill half your plate with fruit or vegetables at each meal), I'm not sure if this always happens. It's pretty easy to just reach for a piece of fruit, but my goal is to consume more dark, leafy greens like collards, mustard greens, bok choy, chard, watercress, arugula, and kale. I've found that the more greens I eat each day, the better I feel. I have more energy, I crave less sugar, and my mood seems more mellow overall. I got together with some friends over the weekend, and we ended up having a conversation about how kale is going to save the world (there's actually a t-shirt that makes this claim!). Needless to say, my friends and I are kale fanatics, and rightfully so. For starters, it's delicious sauteed with garlic, cooked into soups, baked into lasagna, blended into smoothies, marinated in salads, roasted with olive oil, salt and pepper, and oven-crisped to make kid-friendly kale chips. And of course we've all heard about the magnificent health benefits of kale (you can read about these benefits here and here). I have many kale recipes to share with you, but I thought that this simple, refreshing, easy-to-prepare salad is a great start. Make a batch, keep it in your fridge, and snack on it throughout the day as a yummy way to get more fresh fruits and veggies into your life.
INGREDIENTS:
1 large bunch of kale (any variety will work, although I prefer green curly kale or Lacinato)
2 1/2 cups diced Fuji apple (about 2 small apples, or 1 1/2 large)
2 tbsp extra virgin olive oil
3 tbsp fresh lemon juice
the zest of one lemon
1/2 tsp salt
Freshly ground black pepper, to taste (I used 15 turns of my pepper mill. Omit for AIP)
Note: Whenever possible, I like to buy organically grown kale and apples to avoid the pesticides used on conventional varieties.
DIRECTIONS:
Wash your kale well to remove residual dirt, sand, and all of the little critters that love kale as much as we do. I do this by rinsing each stalk individually front and back, and then I shake off the excess water. You can also place your kale in a large bowl, fill it with cold water, then agitate the kale with your hands to loosen any debris. Repeat this 3 times. Drain the excess water from your washed kale by giving it a few good shakes in a colander, or you can use a large salad spinner.
Remove the tough stems from your kale, roughly chop the leaves, and place them in a large mixing bowl.
You can easily "zip" the leaves from the stem by holding the stalk upside down, then grasp the end of the stem with one hand and use your other hand to pull the leaves down, separating them from the stem.
This is how much kale I got after removing the stems, and chopping the leaves with a large knife- around 8 cups.
Prepare your dressing by whisking together the olive oil, lemon juice, lemon zest, salt, and pepper, and then pour this mixture over your kale.
Use your hands to give it all a good mix, then massage the kale leaves to help break down the tough fibers. The volume of the kale will shrink considerably after doing this.
Add in the diced apple, mix again, and do a taste check for seasonings.
Make any necessary adjustments, then store your salad in an airtight container in the fridge for up to 3 days (although I doubt it'll last that long!).
As you can probably tell, this is one of my favorite ways to eat kale. What is yours?

Khima Matar aka Beef & Peas Curry

This is one of my all-time favorite dishes. We ate a lot of khima matar growing up, and I remember both my grandmother and my mom making it. It's nourishing, comforting, deeply satisfying, and I often crave it when I'm feeling rundown. The sweetness of the green peas pairs nicely with the rich, full bodied flavor of the spiced beef in such a perfect way that not only do Ben and I love it, but both of my little guys gobble this up (especially my 14 month old!). I usually serve this with my spiced jasmine rice for Ben and the boys, and then toss some steamed sweet potatoes in coconut oil for myself, to keep my meal paleo. I know that peas are controversial in the paleo world, but they seem to work well for me if eaten in moderation. Feel free to omit the peas if you don't care for them- this curry is still absolutely delicious without them.
INGREDIENTS:
2 tbsp unrefined virgin coconut oil 1 medium yellow onion finely diced (a little more than 1 cup, packed) 1 pound grass fed ground beef 1 tbsp ground cumin 1 1/2 tsp ground turmeric 4 Roma tomatoes 2 inch piece of fresh ginger, peeled and roughly chopped 3 large garlic cloves, or 4 smaller ones, peeled 1 1/2 tsp sea salt, more or less to taste 1 1/2 cups frozen peas 1 1/4 tsp garam masala 1-2 tbsp fresh lemon juice 1/4 cup fresh chopped cilantro
In a large saucepan or Dutch oven, melt the coconut oil over medium heat. Place the onions in the pot with a pinch of salt and saute them until they are golden brown, stirring frequently to prevent burning. This is the most time consuming step of this recipe (it takes me about 15-20 minutes), but it's well worth the effort. I think of browning the onions as creating the foundation for your curry. It lends a depth and sweetness to the dish that you will definitely miss if you skip this step.

While your onions are cooking, puree the tomatoes, ginger, and garlic in a food processor or blender, and set aside. I use a blender to do this, and my puree comes to almost exactly 2.5 cups.


Next, add the ground beef to your browned onions, crumble the beef with a wooden spoon, then stir in the cumin and turmeric. Reduce the heat to medium-low to ensure that the spices don’t burn, and cook the beef until it is no longer pink.

Add the pureed tomato mix to your beef mixture, along with the frozen peas, garam masala, and salt. Mix well, then cover your pot and allow everything to simmer for 30 minutes or more on the lowest setting. The longer it has to simmer, the better the flavors will meld.

Check for salt just before serving. If you don’t taste the spices, you probably need more salt. Stir in some fresh lemon juice and as much chopped cilantro as you'd like. Serve your peas and beef curry with spiced jasmine rice, or steamed sweet potatoes. A side of ripe avocado pairs nicely with this dish as well. We rarely have leftovers after eating this for dinner, but when we do, it's even tastier the next day.
On a side note...
These are some Molokai sweet potatoes that I picked up at my neighborhood farmers market. I had never tried this variety before, but I steamed them and loved their vibrant color after cooking. Molokai sweet potatoes are indeed sweet, and have a subtle, almost floral flavor along with a dense texture that makes them super satisfying to eat.


I want to know about the special finds at YOUR local farmers markets. What's currently in season in your part of the world that you're enjoying right now?

Chai Spiced Chocolate Shake (vegan)

My dear friend Rani is a total foodie, and our mutual love of wholesome, delicious fare is something that we frequently bond over. A few months ago she was kind enough to share a recipe for her new favorite breakfast shake (I think she called me specifically to tell me about this shake), and it was perfect timing because I had been feeling uninspired about my morning meals. She described it as thick and yummy, protein-rich, and full of healthy fats. From the ingredient list it sounded so delicious that I made one for myself that same day, and I've been hooked ever since. Packed with heart-healthy omega-3 fatty acids, (provided by the walnuts and chia seeds), it's the perfect solution for those mornings when I'm not in the mood for a meat and veggies breakfast, or when I'm feeling too lazy to prepare a proper meal for myself. It's also a great snack option whether I'm at home or on the go. Over time I have tweaked the original recipe to reflect my own personal taste, but its essence remains the same: A healthy, decadent, deeply satisfying chocolatey shake that you can feel great about sipping. I know I do!
Prep time: 5-10 minutes Yields: about 16 oz
INGREDIENTS:
1/2 cup unsweetened coconut milk 1/2 of a ripe banana 1/4 cup raw walnut pieces 1 tablespoon chia seeds soaked in 2 tablespoons of water 1 or 2 Medjool dates, pitted (omit if you are avoiding sugar) 1 teaspoon pure vanilla extract 2 tablespoons unflavored protein powder (I use pea protein) 2 teaspoons unsweetened cocoa powder 1/2 teaspoon chai masala 5-7 ice cubes

Clockwise from the top: Ice cubes, soaked chia seeds, pitted dates, banana, vanilla extract, protein powder, cocoa powder and chai masala together in the dish, coconut milk, and walnuts in the middle.
DIRECTIONS:
While you are gathering your ingredients, soak the chia seeds in 2 tablespoons of water in a small dish. This causes them to soften and form a thick gel, which makes them easier to blend, and prevents the seeds from flying up the sides of your blender. Place all of your ingredients into a blender, make sure the cover is on tight, and process on high until smooth. This should take just a couple of minutes, and less if you are using a Vitamix.

All of your shake ingredients in the blender. Don't forget to add the ice cubes too!


Your thick and creamy shake after a couple of minutes of blending. The more ice you add the thicker it will be.

Helpful tips: I use unsweetened coconut milk drink from the dairy case at my local grocer, but any milk will do. I've never tried this with full fat canned coconut milk, but I bet it would be delicious. If you want a nut-free shake, you can use 1/4 cup of shelled, raw sunflower seeds in place of the walnuts (Rani's original shake recipe calls for sunflower seeds). Ground cinnamon, cardamom, or nutmeg would be great substitutions for the chai masala, but I would use 1/4 teaspoon of cinnamon and only 1/8 teaspoon of cardamom or nutmeg instead of the 1/2 teaspoon of chai masala to avoid overpowering the other flavors in the shake. Finally, 2 teaspoons of honey would work well as a sweetener if you don't care for dates, although they are yummy in this!

Chai Masala & Masala Chai
I love chai masala. Translated as "a mix of spices for tea," chai masala is spicy, sweet, pungent, comforting, immune boosting, and its culinary uses are endless. Traditionally, this spicy mix is simmered with black tea, milk, and sugar to make masala chai (spiced tea), a staple in most East Indian households, and a favorite on pretty much every Indian restaurant menu out there. It's definitely a staple in my kitchen pantry, and I use it often. Until last week I had been not-so-slowly chipping away at a small jar of chai masala that my sister brought for us from Tanzania a couple of summers ago (a little bit goes a long way). My stash has rapidly started to dwindle lately, though, because it's a key ingredient in my Chai Spiced Chocolate Shake, which I happily consume several times per week (it's my absolute favorite snack). I was super excited to share this delicious recipe with you all, but I realized that it would be cruel to tease you with the recipe, and then leave you hanging without the chai masala, which is not always easy to find unless you have an Indian grocery in your town. So, I thought this would be the perfect time to try my hand at making my very own chai masala, and I have to say that I am quite pleased with the result. It was both fun and easy to make, and I now have a fresh supply that'll last me a while. I even gave some to my friend for her birthday, and she loved it. The great thing about making any kind of masala (a mix of spices), is that you can tailor it to your own personal taste. I formulated mine to have the right balance of spice, depth, sweetness, and bite. Most chai masalas contain a base of cinnamon, clove, black pepper, green cardamom, and nutmeg. Some people will add saffron, mace, black cardamom, or tulsi (holy basil). I stuck with the base and added saffron to my masala, but next time I think it would be interesting to experiment with black cardamom and tulsi. Make a batch of this as soon as you can, treat yourself to a mug of masala chai (recipe below), and then stay tuned for my Chai Spiced Chocolate Shake recipe!
Here's what you'll need to make your own chai masala:
Spice grinder or coffee grinder
Glass baking dish
Clean glass jar with a tight fitting lid
Microplane or fine grater (If you are using whole nutmeg)
Spices
3/8/14 Update: Last week I made a large spicier batch of chai masala that both Ben and I prefer to my original, mellower recipe. Both are tasty in their own right, so feel free to try either one, and please let me know which you prefer!
Mellower recipe, smaller quantity:
1/4 cup cinnamon sticks, broken into small pieces
25 green cardamom pods, peeled and skins discarded
1 1/2 tsp black peppercorns
1 1/2 tsp whole cloves
2 tbsp + 1 tsp ground ginger
Whole nutmeg to make 1/2 tsp freshly grated nutmeg (you won't need the whole nut) or 1/2 tsp ground nutmeg
1/4 tsp saffron (optional)
Spicy, more pungent recipe and larger quantity (great for sharing with friends):
1/2 cup cinnamon sticks
1/4 cup green cardamom pods, peeled and skins discarded (use 2 tbsp of the cardamom seeds after peeling)
3 tsp black peppercorns
4 tsp whole cloves
1/4 cup plus 2 tbsp ground ginger
1 tsp nutmeg powder (from freshly grated nutmeg, or you can use ground nutmeg)
1/2 tsp saffron
The directions are the same for both recipes, but you will probably need to grind the whole spices of the larger recipe in two batches to accommodate the increase in quantity.

Clockwise from top: Cinnamon, ginger, peppercorns, saffron, cardamom, nutmeg, and cloves in the middle.
DIRECTIONS:
Preheat your oven to 200 degrees. Peel your cardamom pods to reveal the whole spices inside, and discard the skins. Break the cinnamon sticks into small pieces, then place the peeled cardamom, cinnamon, peppercorns, and cloves in a glass baking dish.

This is what cardamom looks like once it's been peeled.

Whole spices in a glass baking dish.
Place the baking dish in your preheated oven and roast the whole spices, uncovered, for 12-15 minutes. You want to roast the spices long enough to bring out their aromas, but not so long that they burn. Remove from the oven and allow the spices to cool. While the spices are roasting, grate your nutmeg if you are using whole nutmeg.

I like to grate whole nutmeg with a Microplane.
Before grinding your spices, be certain that your coffee or spice grinder cup and lid is clean and completely dry (any moisture will cause your masala to stick and clump), and set it to the finest grind (mine is espresso).

An inexpensive coffee grinder doubles as a spice grinder.
Once your roasted spices have cooled, place the cinnamon pieces, peppercorns, cardamom, and cloves in your grinder, and blend until you have a fine powder.

Whole spices before grinding.

Finely powdered spices after grinding.
Turn this mixture out into a clean bowl, then add your saffron, ground ginger, and nutmeg powder. Stir until it's well combined, then carefully spoon or funnel your masala into a clean, dry jar.

A closer look at your finished product after mixing in the nutmeg, ginger, and saffron.

I always store my spices in glass jars, away from direct sunlight. This keeps them fresh longer.
This might seem like a lot of work for such a small jar of finished product, but I guarantee it's worth the effort. A little bit really does go a long way, you'll have the satisfaction of knowing that you made it yourself, and nothing compares flavor-wise to freshly roasted and ground spices. Feel free to experiment with the quantities of each spice to achieve a flavor that you love, and enjoy your chai masala in any dish that traditionally calls for cinnamon. Add it to hot milk, oatmeal, cookies, fruit cobbler, ice cream, or make yourself a hot mug of proper Masala Chai:
INGREDIENTS:
1 1/4 cups milk (I prefer unsweetened coconut milk or almond milk, but any type of milk will do)
1/4 tsp chai masala
1 black tea bag (Rooibos tea is great non-caffeinated option)
2 tsp honey, more or less to taste
DIRECTIONS:
Bring the milk, chai masala, and tea bag to a slow boil in a small saucepan. Simmer on low for 3-4 minutes, stirring frequently, then pour through a fine mesh strainer into a mug. Add honey to taste, and enjoy!
I would love your feedback! What is your favorite cold weather drink?

Bacon, Squash & Sweet Potato Hash (paleo)

I usually wake up ravenous, and this past Saturday morning was no exception. I could have reached for gluten free toast slathered in almond butter, but I decided to scrounge through the fridge to see what kind of hearty paleo breakfast I could come up with. I had a container of leftover oven roasted butternut squash and sweet potatoes that I had used the day before to make a delicious soup, so I grabbed that plus some bacon, red onion, celery, and fresh thyme I had purchased from my local farmers market. When I start my day off with protein and vegetables, I find that it's much easier to stay on track for the rest of the day. Right now staying on track for me means eating mostly paleo. No grains, legumes, dairy, or refined sugar. This savory hash is what I came up with. Feel free to substitute whatever roasted veggies and fresh herbs you have on hand. If you want to make this dish, but don't have any roasted vegetables in your fridge and don't want to hassle with roasting them, an easy shortcut is to simply steam the squash and sweet potatoes until fork tender, then toss them in a bit of extra virgin olive oil, salt, and pepper before adding them to the skillet. And if you don't have any bacon at home, your favorite sausage either crumbled or roughly chopped will do the trick. Omit the meat if you are vegetarian, or try this with veggie sausage. You can't really mess up a hash, so enjoy getting creative with your ingredients.
PREP TIME: 15 minutes COOK TIME: 15 minutes SERVES: 1
INGREDIENTS:
1 tablespoon extra virgin olive oil
1/4 cup red onion, sliced
2 stalks celery, roughly chopped
3 strips nitrate free bacon, cooked and roughly chopped
1 1/2 cups roasted sweet potatoes and butternut squash
1 1/2 teaspoon fresh thyme leaves
Salt and fresh ground black pepper to taste
1/2 tablespoon chopped fresh Italian parsley
1 pastured egg, cooked to your preference (I like over medium)
DIRECTIONS:
Heat olive oil in a medium skillet over medium heat. Place red onion, celery, thyme, and a sprinkle of salt in the skillet and saute until the vegetables are tender. Add bacon and roasted squash and sweet potatoes and gently saute until the roasted vegetables are heated through. Stir in the parsley, season with salt and pepper to taste, then top with a fried egg and dig in. I enjoyed my hash with a mug of hot chai.

I'd love to hear from you! What is YOUR favorite weekend breakfast?